This how to describes the process of removing the OEM bushings and installing the Polyurethane bushings. The standard procedure for locating and removing the shifter linkage will be outlined in a Chilton or Haynes manual. It is not required to remove the entire shifter assembly but it does make it easier and allow the ability to clean up & paint. You will need to disconnect the exhaust at the Y pipe and allow it to hang freely under the car to access the bottom side of the shifter, along with remove the rear cross member to allow access to the transmission selector and stabilizer ends.
Standard tools required
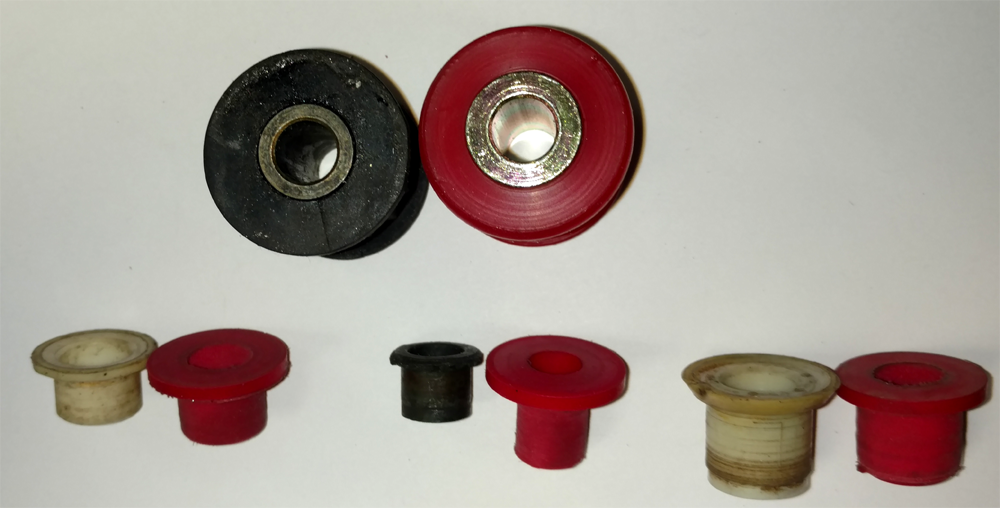
OEM vs Polyurethane Comparison


Remove the shifter linkage from car. The Shifter Stabilizer can remain on the car.


The Joint at the end of the shifter linkage that is connected to the transmission is “Riveted” in place. This rivet pin will need to be ground down each side of the shifter bracket joint to remove the rivet pin. Grind down both sides of the rivet, as pictured below.
Step 2a. After grinding down both sides of the rivet, pry the shift linkage out of the bracket. It is easier to clamp the linkage in a Vise and use a hammer & Pry tool. Attempting to tap the pin out with a hammer and punch may not work as the rivet pin is larger then the hole opening.

Now that the Rivet is removed, you can assemble your Polyurethane bushings for the shifter joint. Add the energy suspension pre-lube to each the exterior of the bushing and the interior of the polyurethane bushing before pressing in. These energy suspension polyurethane bushings should press in with a bit of resistance for a snug fit. Use the supplied clevis pin & bowtie pin to secure the joint back together.

Install the shifter end bushings. Add the energy suspension pre-lube to each the exterior of the bushing and the interior of the polyurethane bushing before pressing in. You will be reusing the OEM metal sleeve from the previous OEM shifter bushings. Add the energy suspension pre-lube to each the exterior of the OEM sleeve and press it into the polyurethane bushings.

Install Transmission Selector end bushings. Add the energy suspension pre-lube to each the exterior of the bushing and the interior of the polyurethane bushing before pressing in.

Remove OEM shifter stabilizer arm from the transmission. The OEM bushing is a flexible rubber with a internal sleeve. Press out the sleeve by hand or a screw driver. Once the sleeve is out the rubber bushing should be manipulate able and can be forced out by hand. When you have removed the rubber bushing. Separate the supplied polyurethane bushing from its sleeve and Add the energy suspension pre-lube to each the exterior of the bushing and the interior of the polyurethane bushing before pressing in. Reinsert the sleeve and use the factory bolt to rebolt it back to the transmission.

Reinstall the shifter linkage to the car. Use the supplied nut and bolt to secure the shifter end of the linkage to the shifter. Tighten the bolt so that it just touch’s the shifter and can still turn by hand. Use the OEM nut and bolt to secure the selector end of the shifter to the transmission selector. Tighten the bolt so that it is snug against the selector bracket. Over tightening either bolt may shifter too solid.

Test shifter inside of car. The shifter tightness can be adjusted by tightening or loosening the shifter and selector nut and bolt to meet your shifter firmness requirements.


