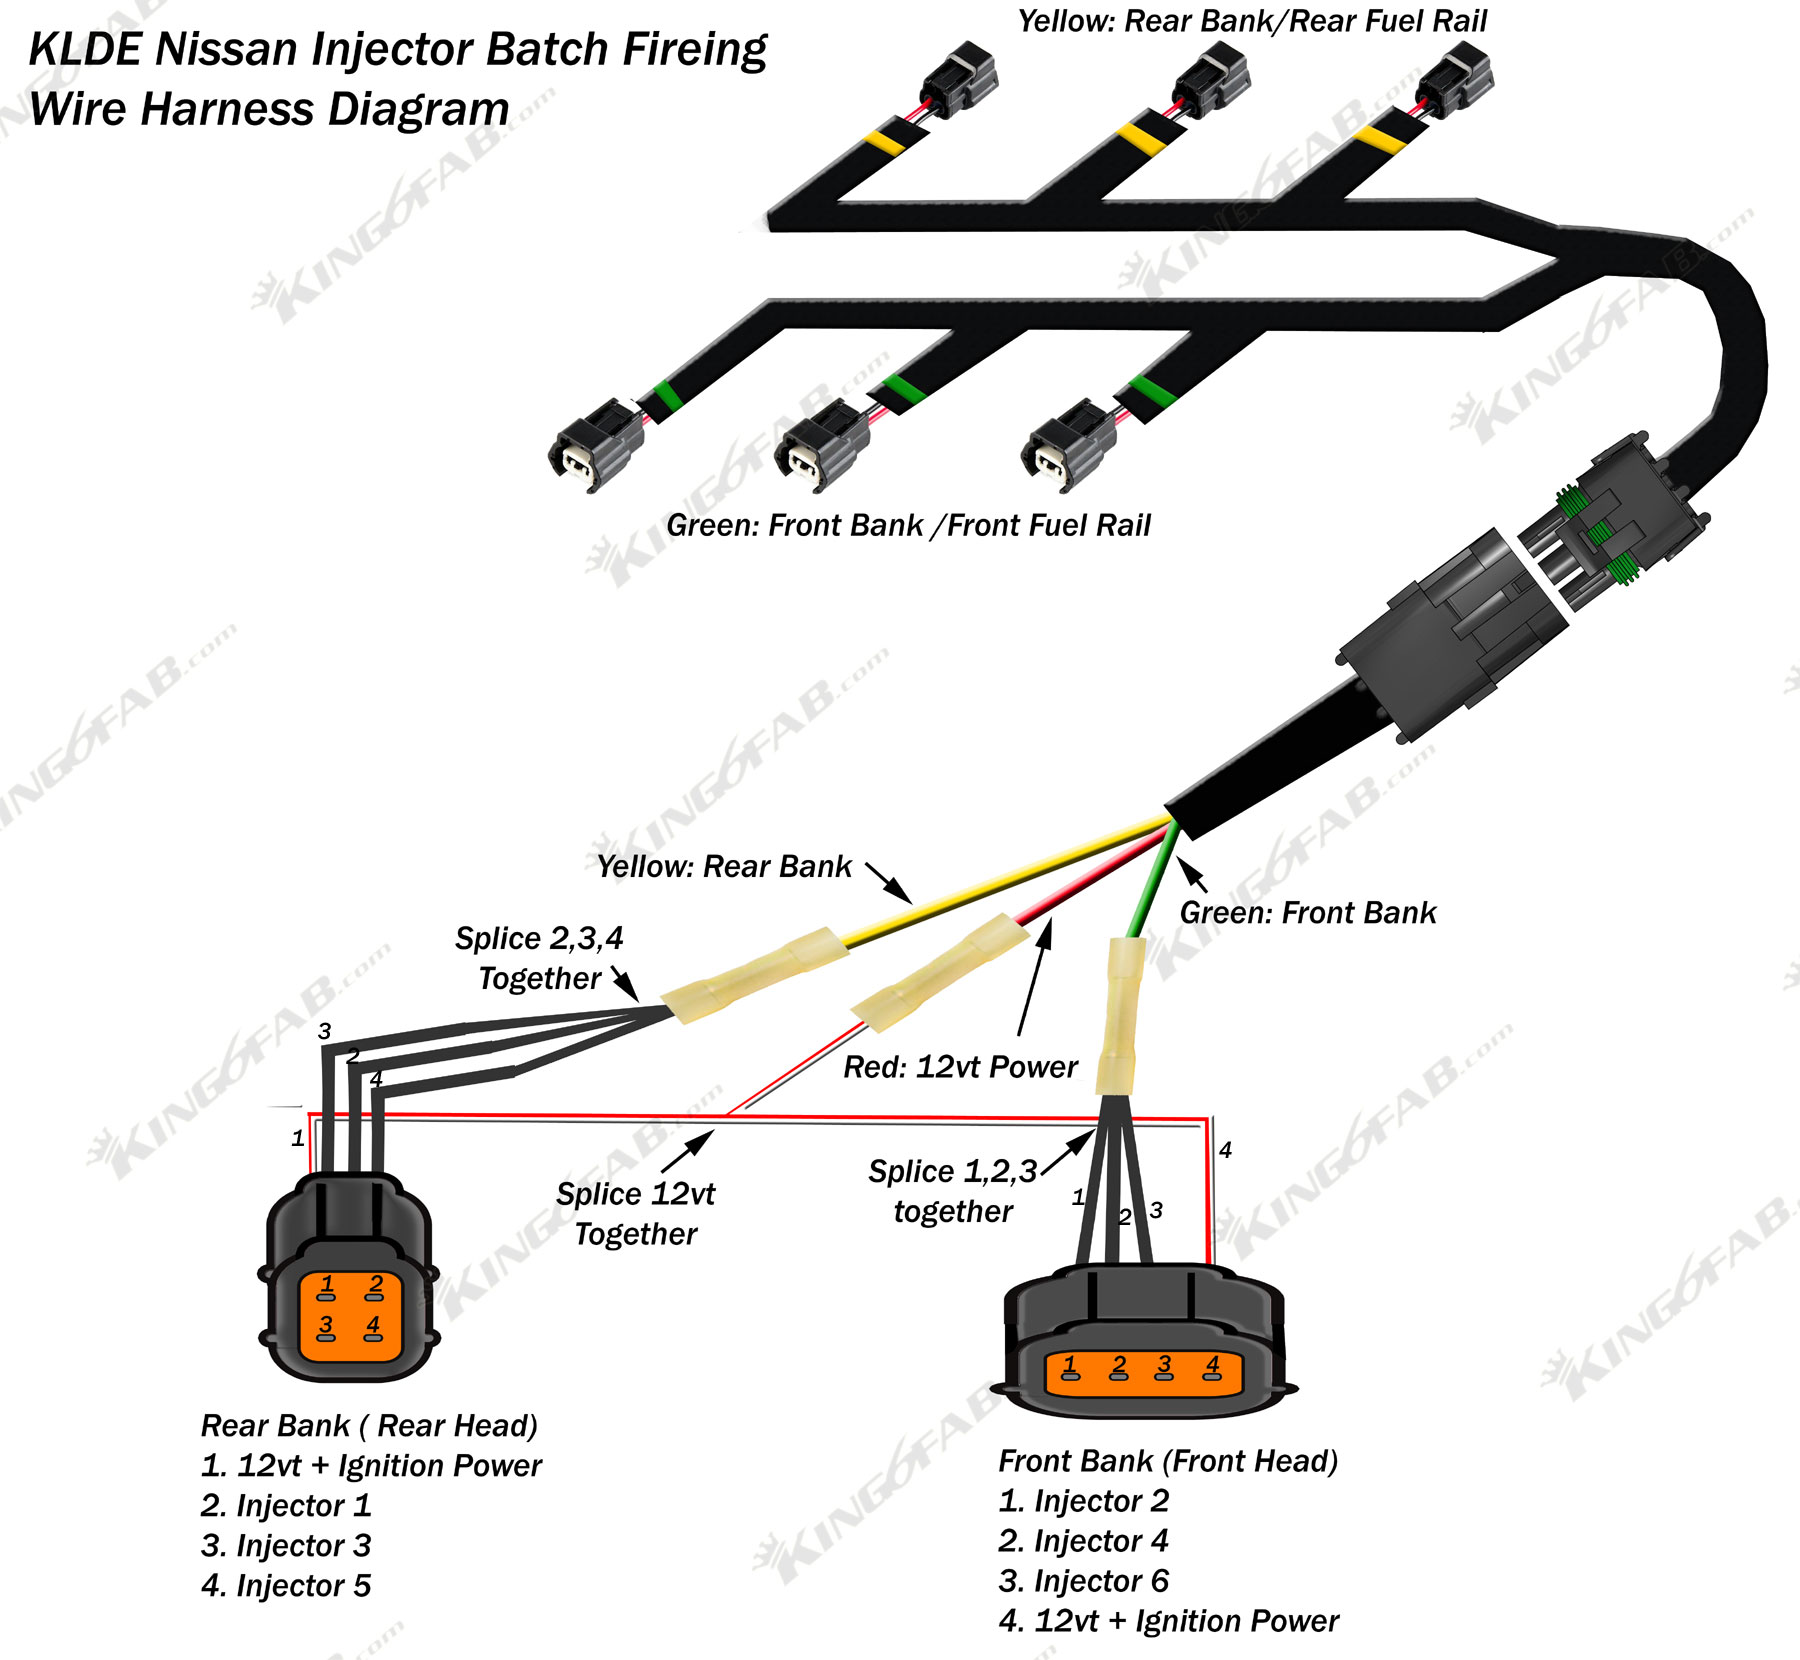
Batch Fire Wiring
Installation How to
1.Locate the fuel rail electrical connectors, It is recommended to do one at a time.
2.Start with the rear fuel rail, with a utility knife carefully cut open the protect sleeving after the connector, cut away as much as possible.
3.You will be cutting off the OEM connectors in this process, if you would like to keep the connectors to swap back to OEM injectors ever, it is recommended to cut behind the connector about 2in as to leave enough wire for re-connection.
4. First locate the Positive 12volt wire, either by using the diagram or using a test light.
To use a test light, turn the ignition of the car to ON, attach the clamp end of the light the negative ground post or chassis ground, then probe each of the 4 wires at the connector. The 12volt wire will light up the test light. Do this for both fuel rail connectors. Cut those 12volt wires and splice them together so they make 1 wire. Crimp that now 1 wire to the red wire of the Nissan injector harness. The remaining 3 wires of each connector are the Injectors.
5. Start with the rear fuel rail connector, cut all 3 wires and splice them together so they make 1 wire. Crimp or solder that now 1 wire to the yellow wire of the Nissan injector harness.
6. Now do the same for the front fuel rail connector, crimping that now 1 wire to the green wire.
7. When attaching the harness to the injectors, the injectors will need to be mounted to the intake manifold. Be sure you connect all yellow connectors to the rear fuel rail, and green connectors to the front fuel rail. Mismatching these will cause problems.
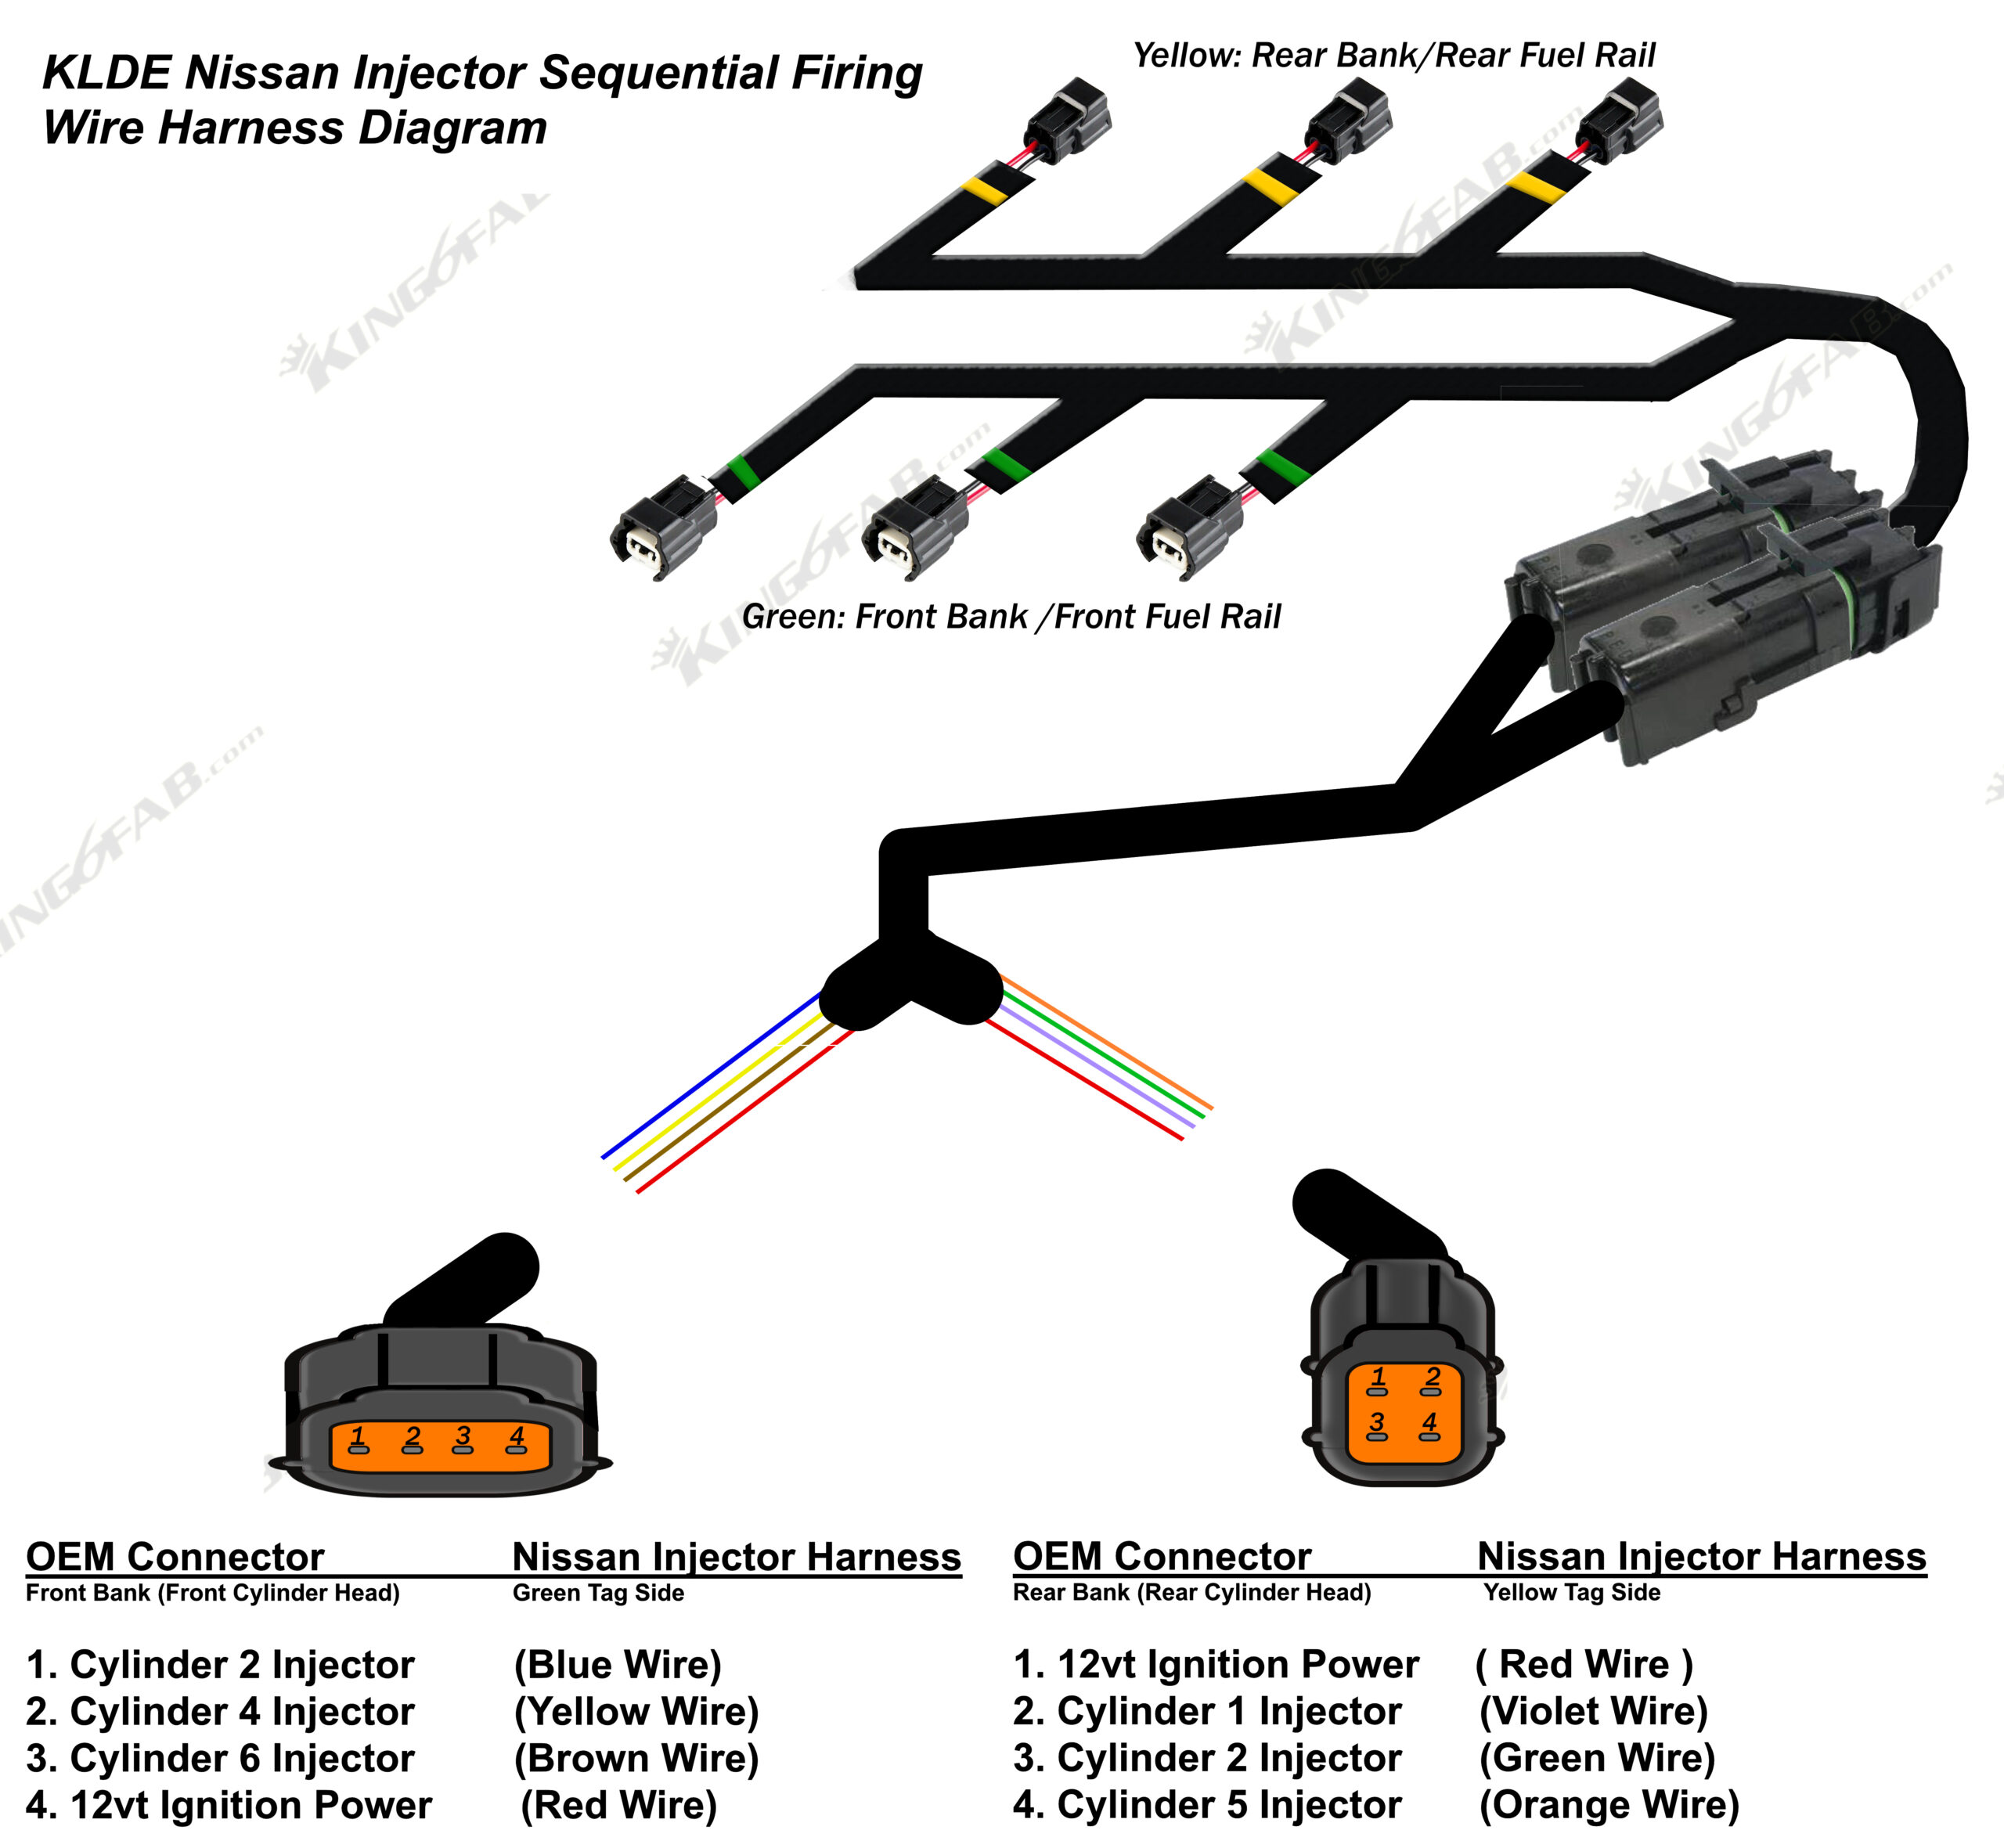
Sequential Fire Wiring
Installation How to
1.Locate the fuel rail electrical connectors, It is recommended to do one at a time.
2.Start with the rear fuel rail, with a utility knife carefully cut open the protect sleeving after the connector, cut away as much as possible.
3.You will be cutting off the OEM connectors in this process, if you would like to keep the connectors to swap back to OEM injectors ever, it is recommended to cut behind the connector about 2in as to leave enough wire for re-connection.
4. First locate the Positive 12volt wire, either by using the diagram or using a test light.
To use a test light, turn the ignition of the car to ON, attach the clamp end of the light the negative ground post or chassis ground, then probe each of the 4 wires at the connector. The 12volt wire will light up the test light. Do this for both fuel rail connectors. Cut those 12volt wires and solder or crimp the wire to the red wire of the Nissan injector harness. The remaining 3 wires of each connector are the Injectors.
5. Start with the rear fuel rail connector, cut all 3 wires on the oem connecter. One by one solder or splice crimp the wires to the corresponding wire using the the Nissan injector harness diagram.
6. Now do the same for the front fuel rail connector.
7. When attaching the harness to the injectors, the injectors will need to be mounted to the intake manifold. Be sure you connect all yellow connectors to the rear fuel rail, and green connectors to the front fuel rail. Mismatching these will cause problems.

