Megasquirt Settings
Getting Dialed in for Boost
MSPNP Boost Setup
Page 9.
Step 1. Setting up your Megasquirt settings
If you haven’t already bought the full version of Tunerstudio, I highly recommend it. It is almost impossible to drive your car around with a passenger trying to tune your tables while you drive. The full version features a Live Autotune that you can use while you drive around in all conditions. Just think of the price of the program as a dyno and tuner you can always use and it quickly pays for itself the first time. This will dial in your fuel for Boost, Idle and Cruise. Its fast as well, did you have your fuel pressure to low and need to raise it? That takes some guess work and time to remap your VE table..just turn on Live and drive around and within a few miles you will be back into the AFR you want it to run.
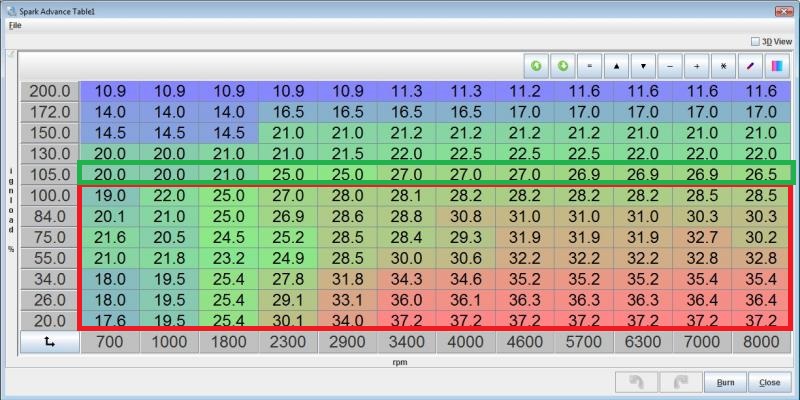
Spark Advance Table
On the right is the spark advance table, this one is based off the DIYAutotune start up tune. All of the Naturally Aspirated (NA) portion in the redbox should match your tune. If it doesn’t, change it. These are the optimal timing settings for the NA V6. The green Box is the Preboost/low boost timing portion. This ranges from 0psi (100kpa) thru 4.2 psi (130kpa). I advanced this portion for a bit of increased “put you back in the seat power” when transitioning to boost. After the 130kpa the timing is pulled significantly to reduce the chances or preignition/detonation. Its possible to keep this portion advanced more without the risk but this would require some form of methanol injection
Step 2. Overboost protection
I recommend setting this up as a fail safe, set it to 2psi more then you want it to activate at. (If your goal is to run 6psi, set it for 8psi) If your just starting, it might be a good idea to start this off low around 4psi to make sure you dont have any missed issues with the car such as the wastegate hoses hooked up backwards -this will cause a huge boost spike and potential engine damage if your not tuned correctly for higher boost. On the right is the conversion chart for KPA into BOOST psi and where to find the overboost protection settings.
Step 3. Wideband 02 Sensor
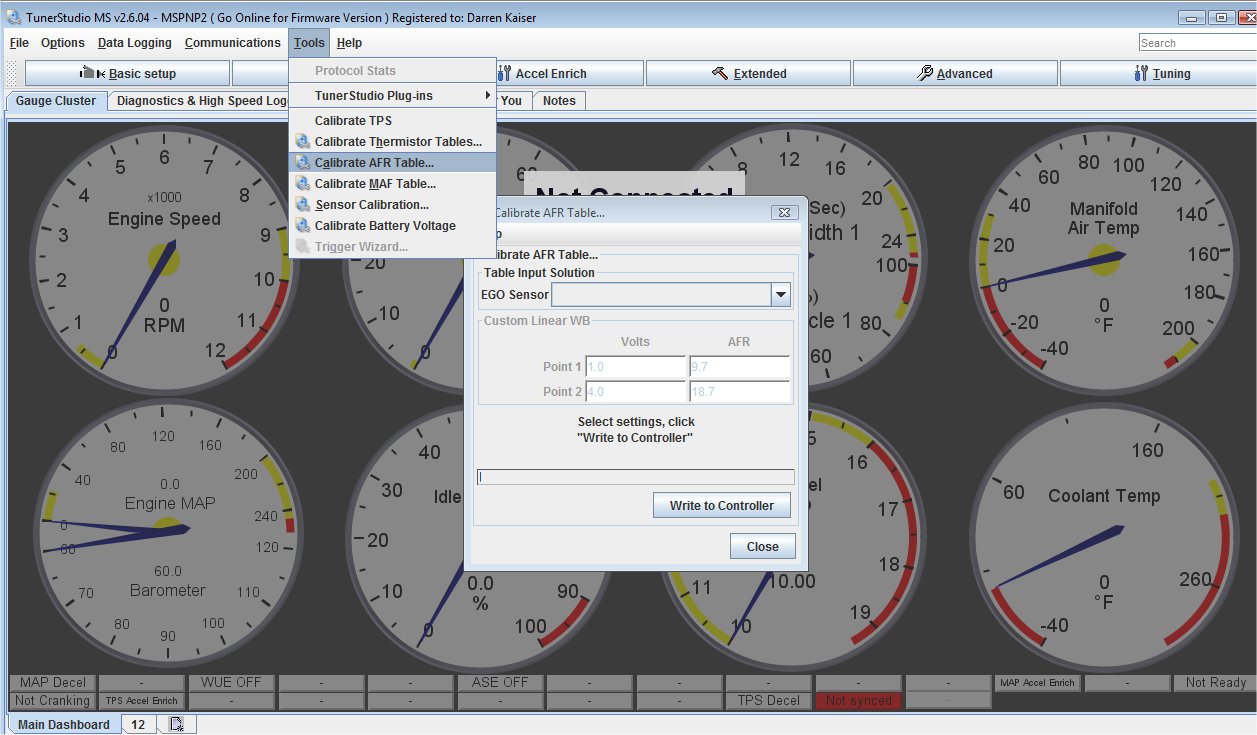
You will need to setup your wideband controller now, to do this find the calibrate AFR as showing in picture 1. Then select the Wideband you are using in the drop down box.
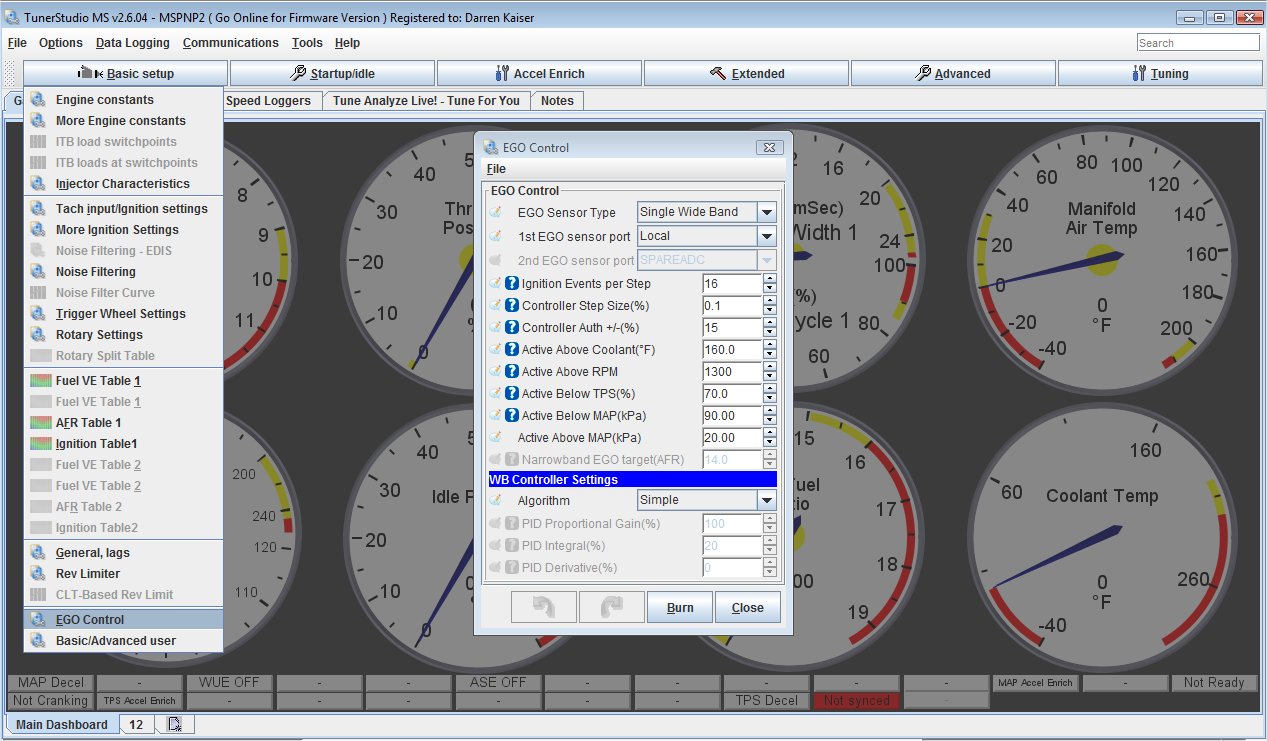
Next find the EGO control settings as showing in picture 2 and selected single wideband.
Step 4. AFR Table
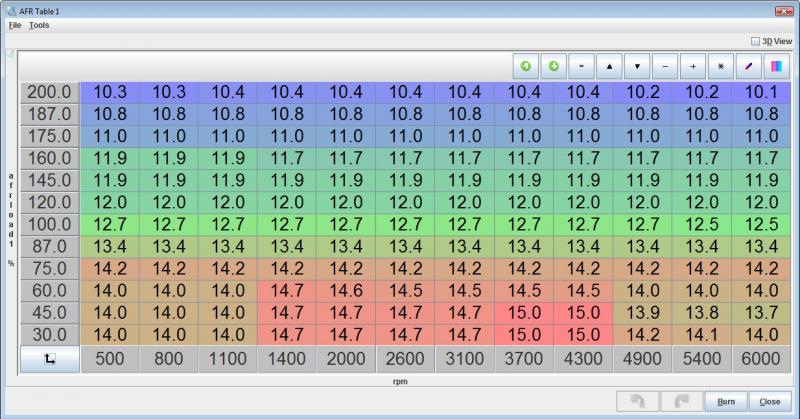
This is where things get handy for those of us that dont have access to dyno time. First make sure you have your 02 sensor selected on the EGO settings. You can calibrate this table to run a desired AFR at certain RPM’s and KPA. If you have the full version of tuner studio, you can use the real time analzye to auto tune the car for you while you drive based on this table. Feel free to use this table if your using moderate timing as its a safe & power making table for boosting on. If your using aggressive advanced timing in boost, you will need to richen the table up.
AFR 10.0 being rich 11-12.0 is the optimal range for boost, 13-14.0 is best for idle and 14.5-15.5 is best for cruise
Step 5. Coolant Temp Settings
On the left is where to find the coolant temp sensor settings, yours might not be calibrated correctly right out of the box. In the picture on the left is the resistance value & temp converted to OHM’s for a temp sensor on a 94 KLDE. Copy these and write them to your controller.
Step 6. Fan Control Settings
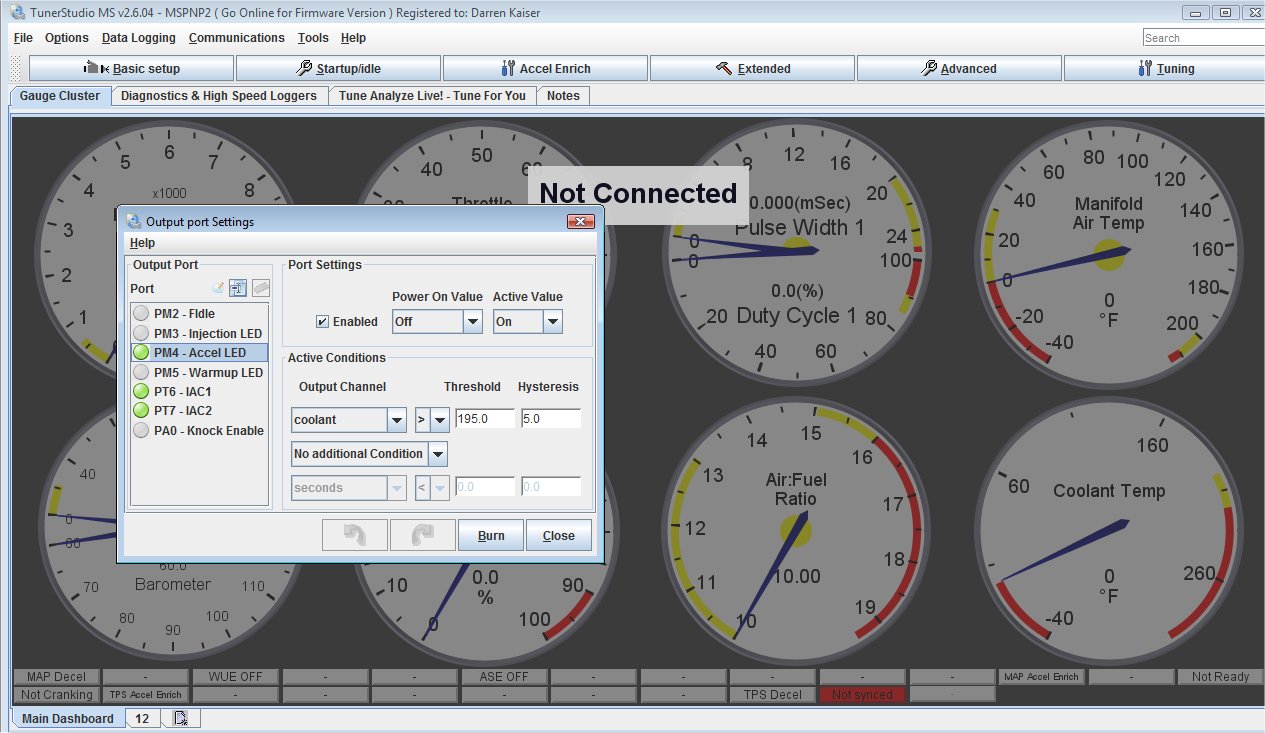
On the right is where to find the fan control settings. This is found under the “advanced tab” and near the top of the drop down menu labeled output port settings. It is here where you can adjust when your fans will come on, the factory temp for the high speed fans is 195deg. Normall Operating Temp for the motor is 210deg.
All of this portion of guide should only be done after your car is already running on Megasquirt from (Step A or Step A Options). DO NOT PROCEED IF YOUR CAR DOESNT RUN YET.
For these next steps, the key will need to be in the ignition, turned to “ON” with your laptop plugged into the MSPNP and connected to Tunerstudio. When you are finished with these steps, burn the tune to the MSPNP, save it as a new file called “BOOSTTUNE”. Then turn your ignition off, then back on and start the car. Check if everything loaded correctly and your good to go.
Step 7. The VE table
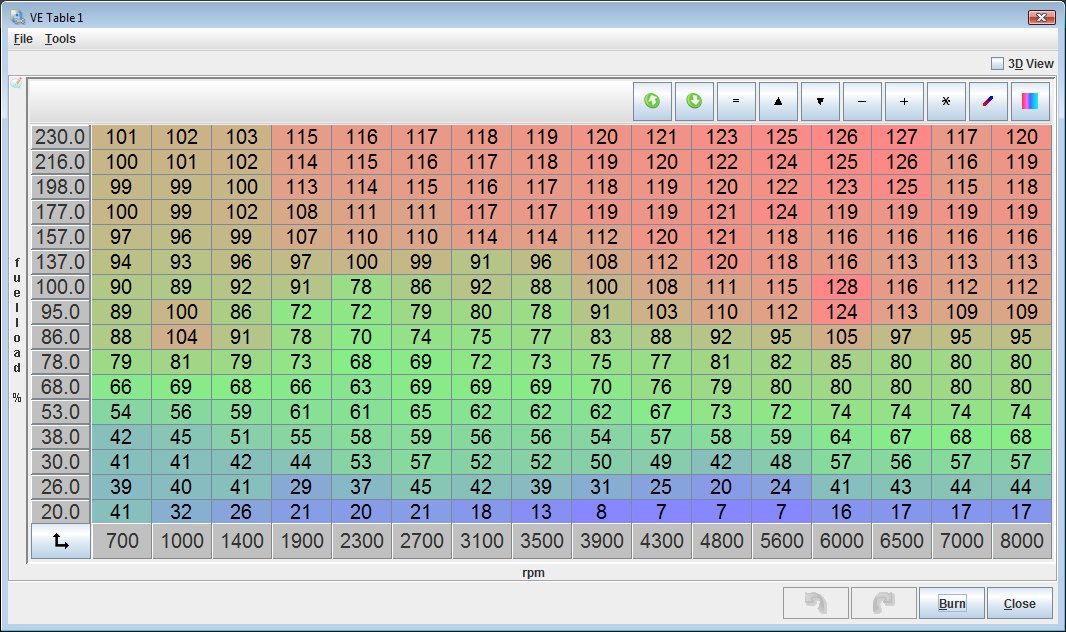
Generally this is good to go from DIYAutotune, Everything under 100kpa has been dyno proven. I started on this table and allowed the Live auto tune feature to dial in the fuel using the AFR table. I wouldnt change to much of this on your own unless your certain you know what your doing. This is a good starting point for low boost with Millenia S Injectors, compare your table and you can adjust as needed.
Step 8. Autotune
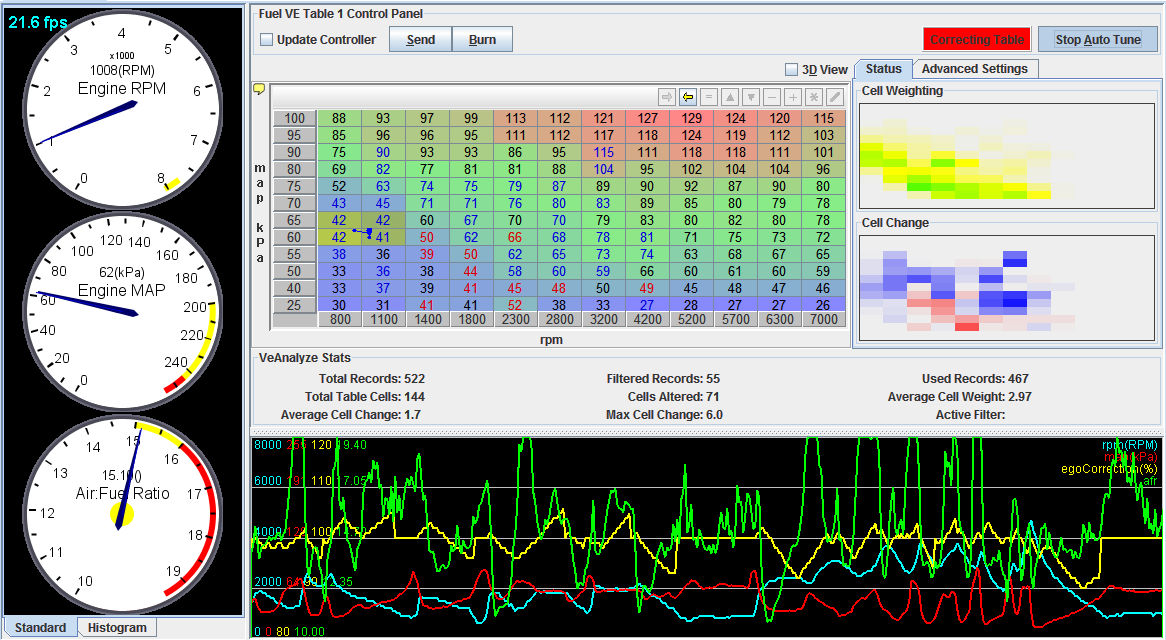
Once you have the 3 tables (timing,afr,ve) relatively where you want them, Id start the live auto tune feature for the warm up. Once the car is warm up, this feature will be inactive so you can stop it. Then start the live auto tune feature and start doing some light driving. I recommend doing normal cruise driving then find a safe and low traffic area to work on boost pulls while keeping an eye on your wideband. This is also a good time to turn on the datalogger so you can go back and look at what your engine is doing for Duty cycle on the injectors and what AFR your hitting at boost levels.
From this point you should be good to go and play with the car.
