
MSPNP Ignition Options
Wasted Spark Ignition
Now that your replacing the ECU with a PNP unit, you have options for ignition control, The MSPNP will run your factory distributor right out of the box, however this distributor is a problematic part and that’s the last thing you want after you turbo the engine. I recommend upgrading your ignition system to a coil pack setup. The factory distributors are problematic and unreliable. A good coil pack setup will benefit stronger spark, faster startups, reliability and easy timing control.
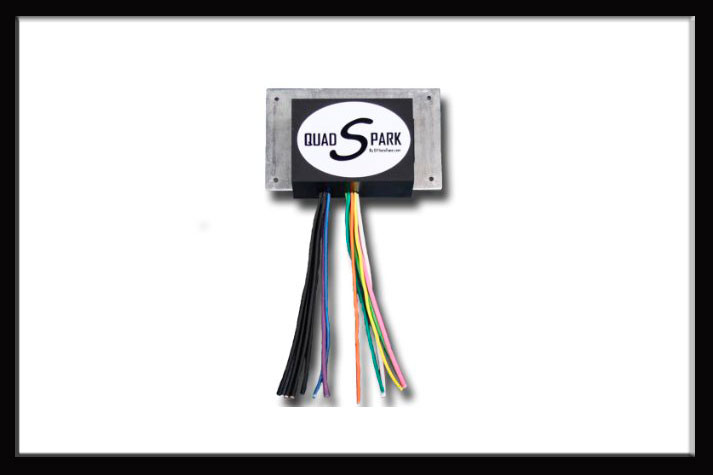
You will need Coil Igniter for the MSPNP to run the coil pack.
For Easy documentation, I recommend going with the Quad Spark from Diyautotune.com. Its a sealed unit with color coded wires and easy to mount. Other Igniters can be used, but this will require searching around on your part.
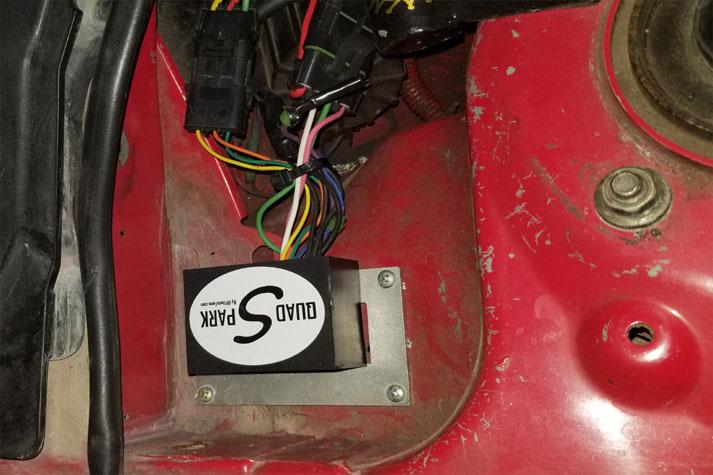
Wasted Spark Ignition
Coil Packs & Coil on Plugs
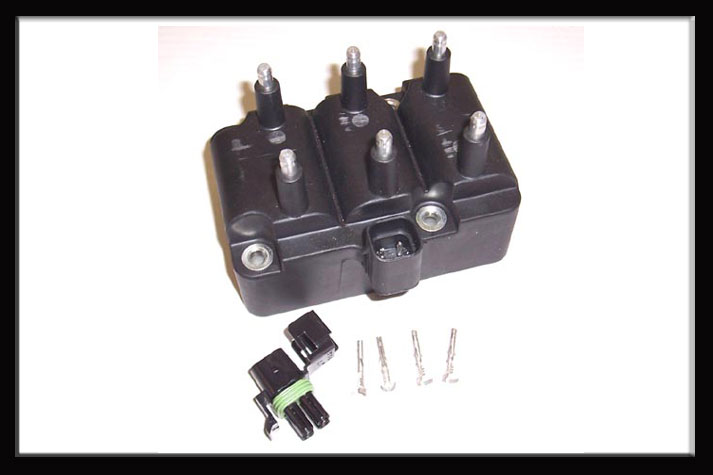
You will need a Coil Pack(s) for 6 cylinders.
This can be any coil pack that has 6 outputs, such as the 2000+ 626 and ford units. You can even use a coil on plug. For easy mounting the IGN-6 Coil pack is the best option, being its flat on the bottom however this coil pack isn’t easily found from other retailers that could be a problem if it fails in the future.
Coil Pack Mounting
King6fab Provides Solutions
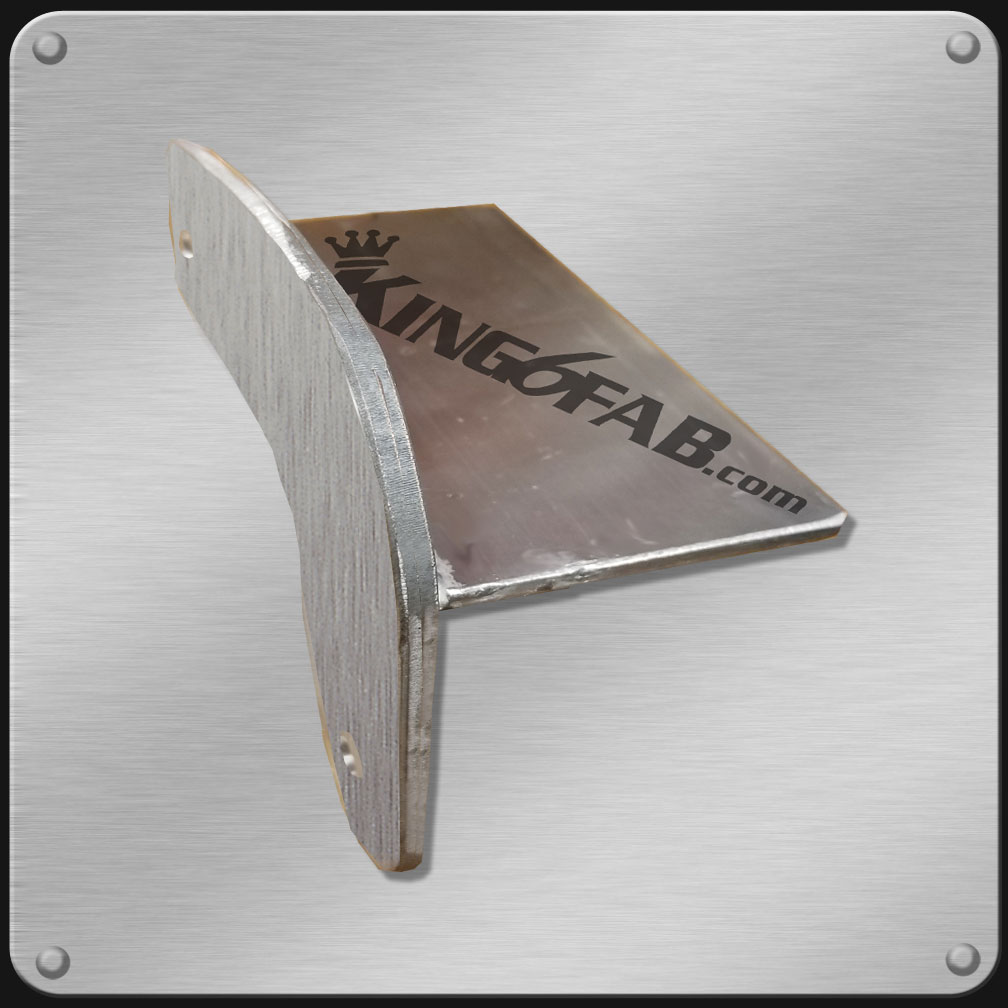
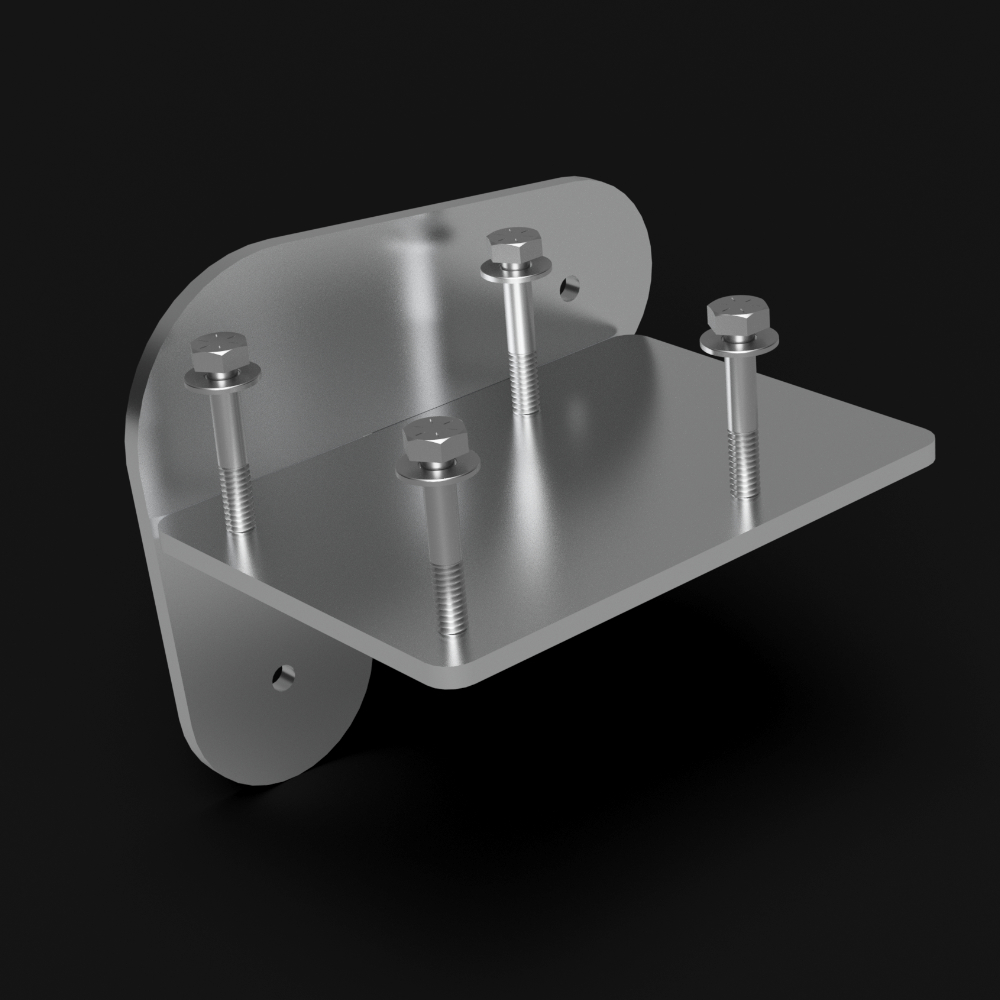
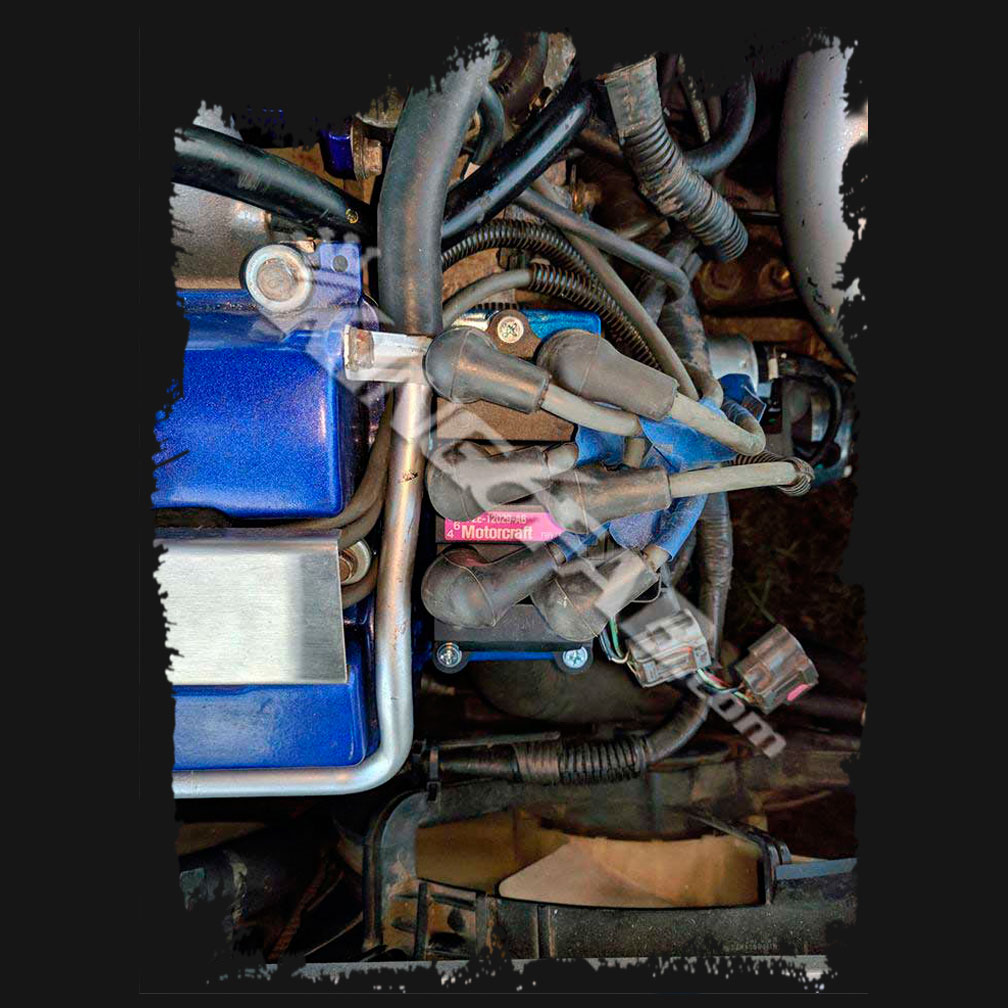
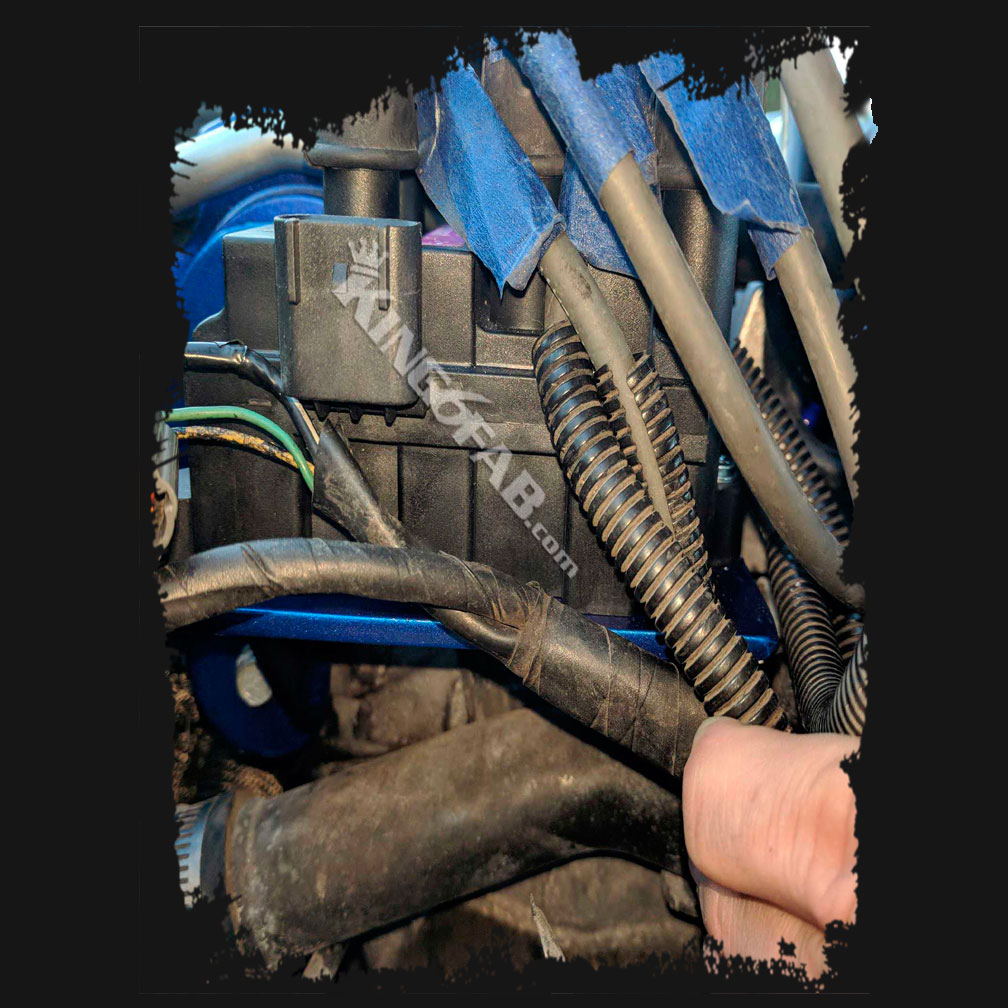
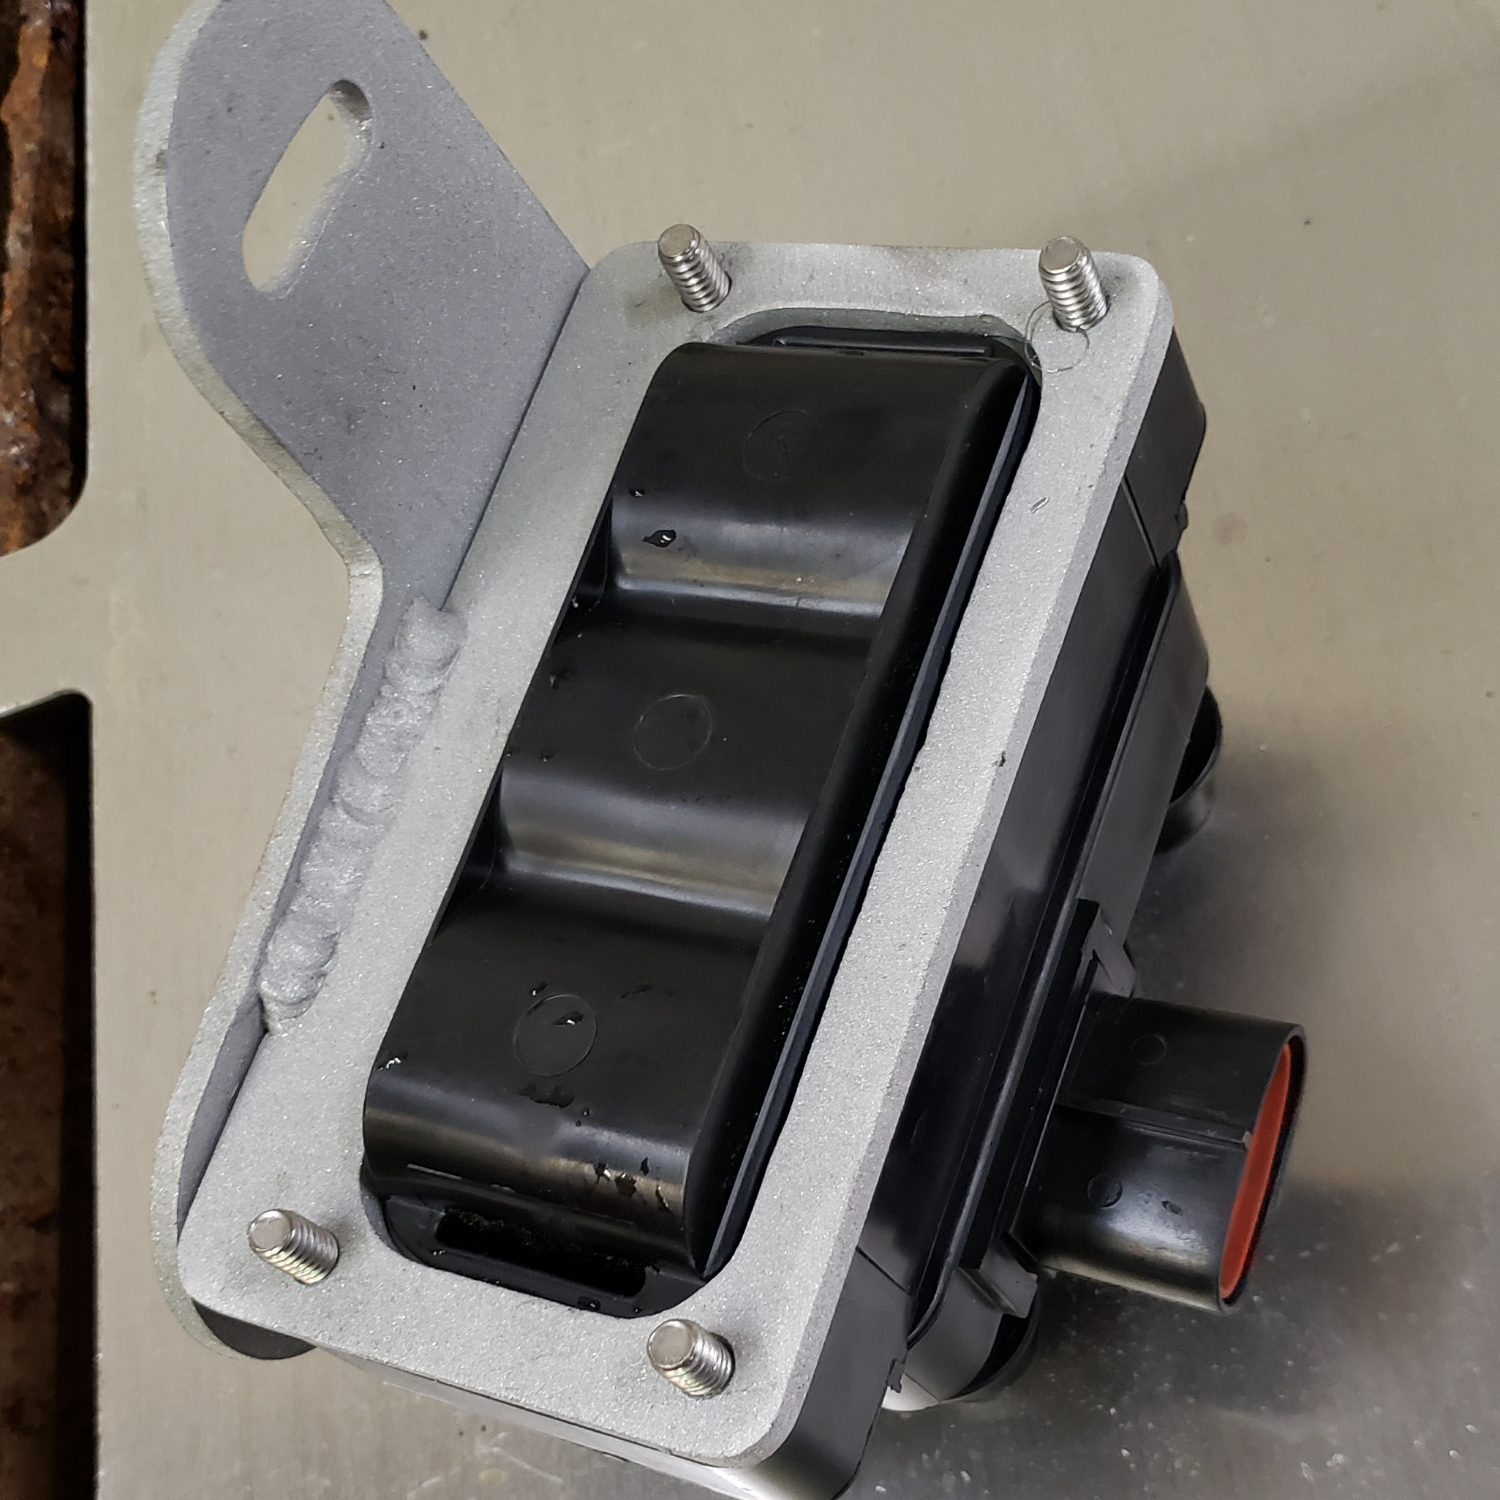
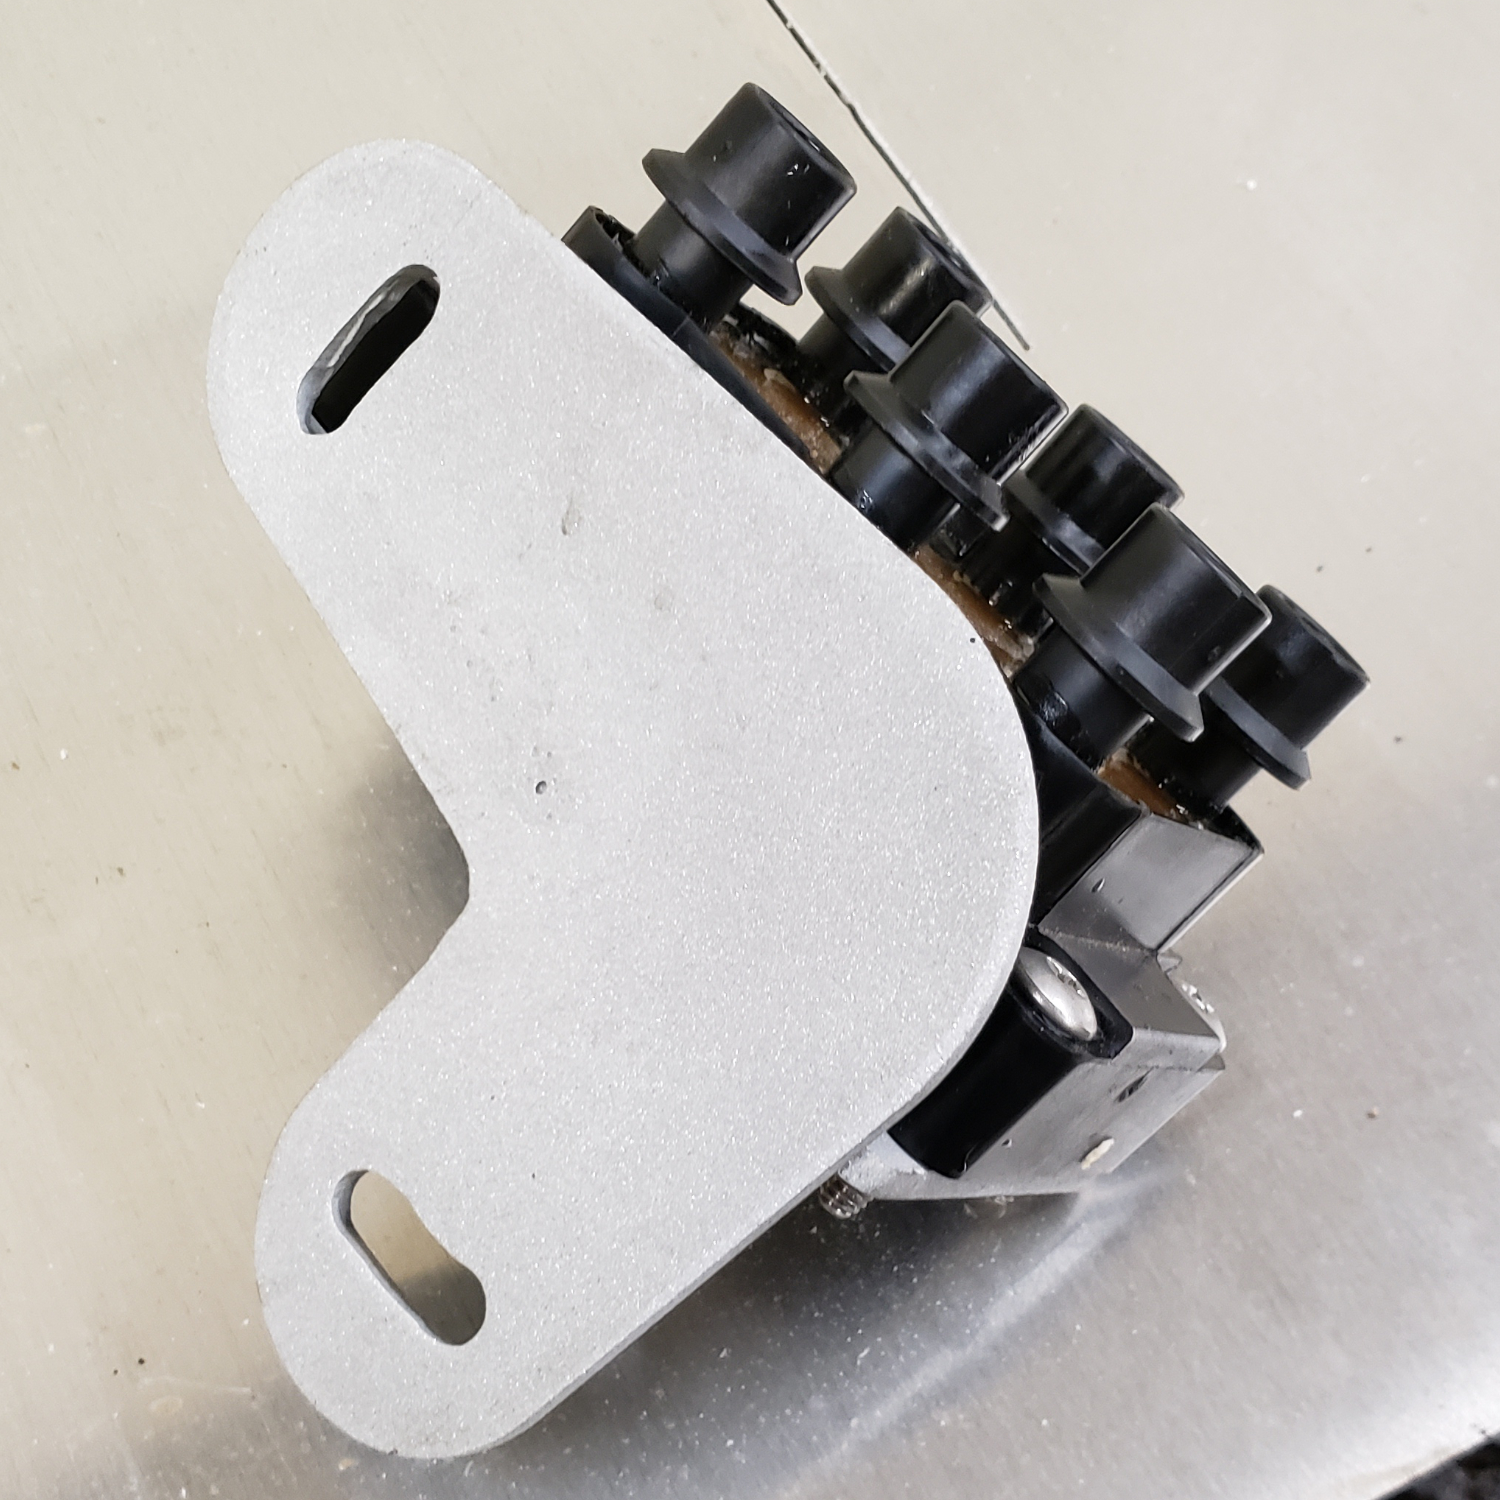
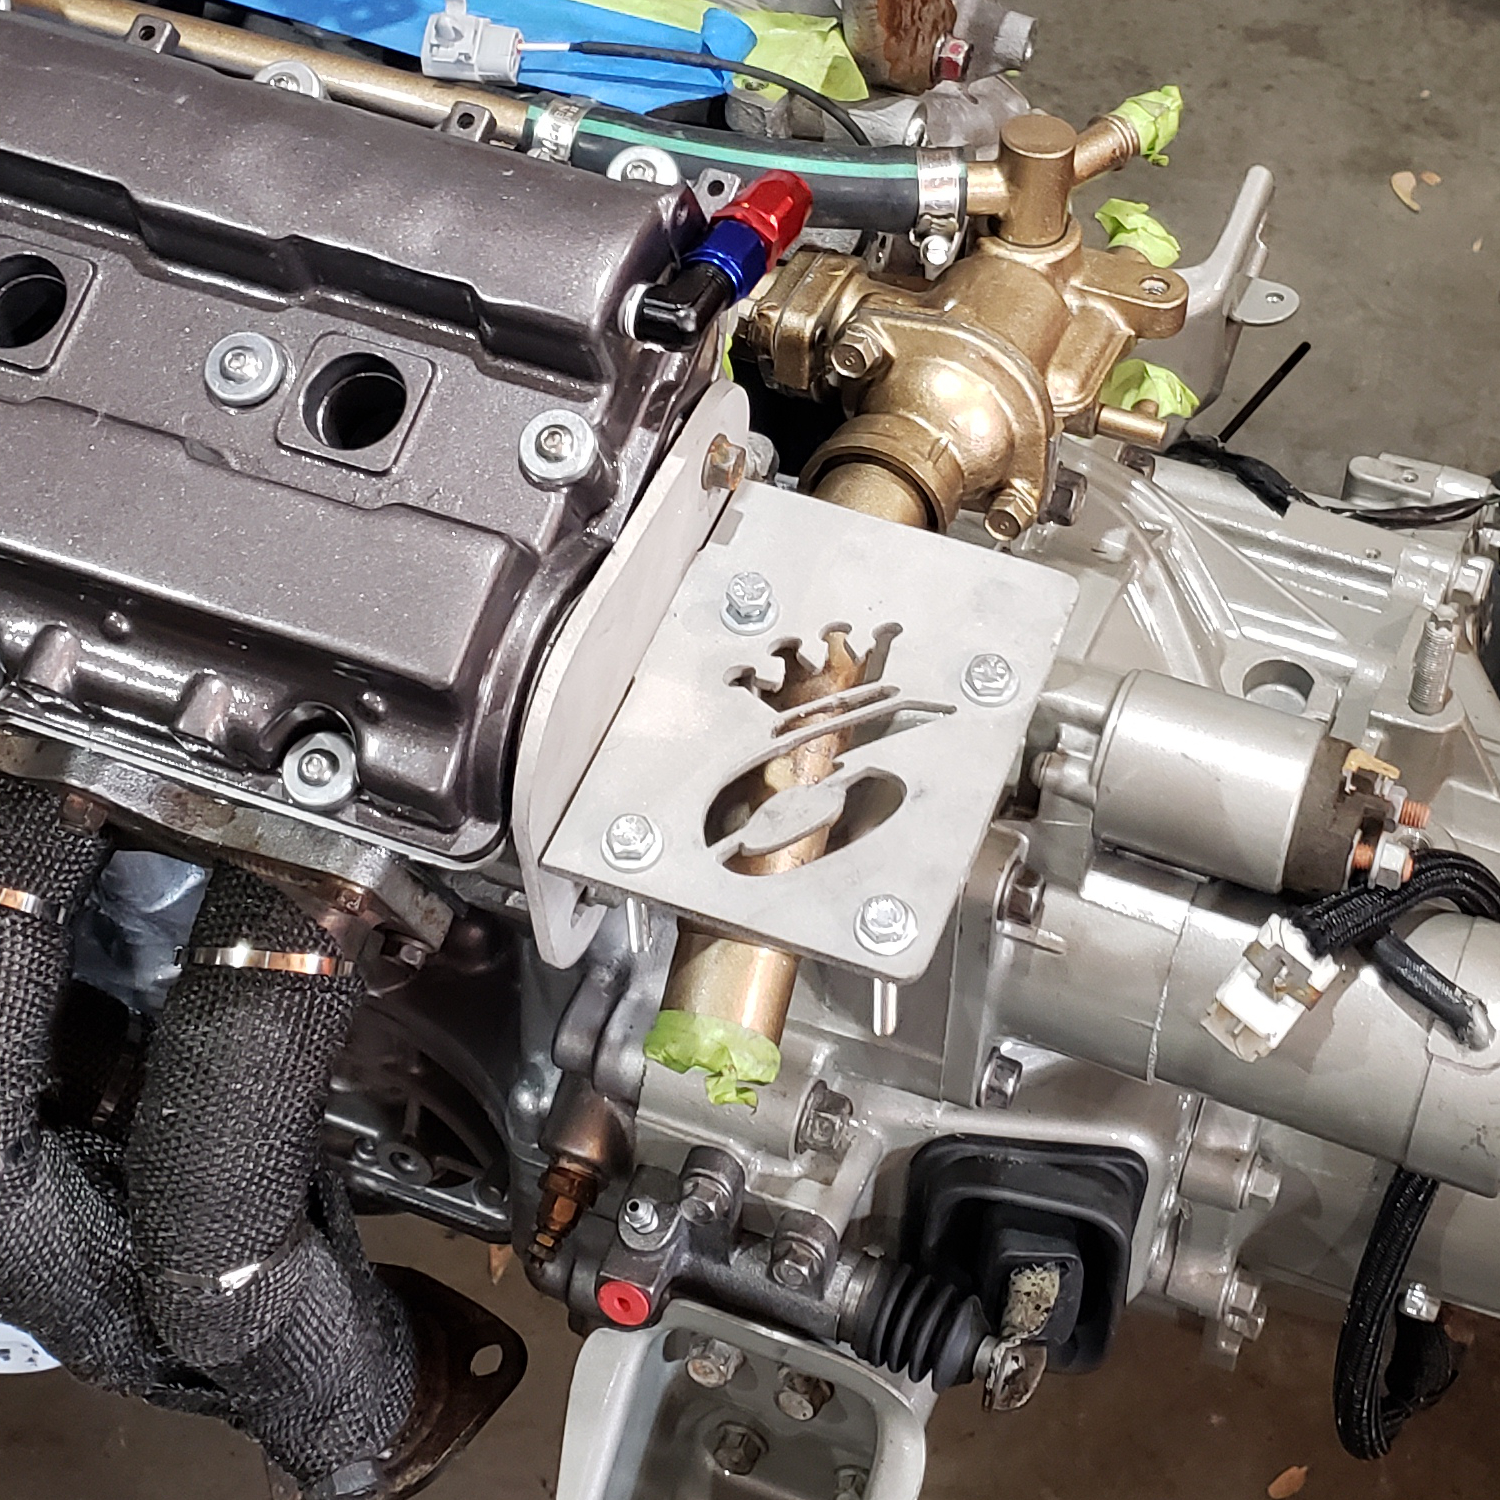
Mounting a coil pack can be challenging if you dont have the proper skills or tools. King6fab has designed a bracket that utilizes the distributor location. This allows the existing spark plug wires to be used and keeps the coil pack away from unnecessary heat.
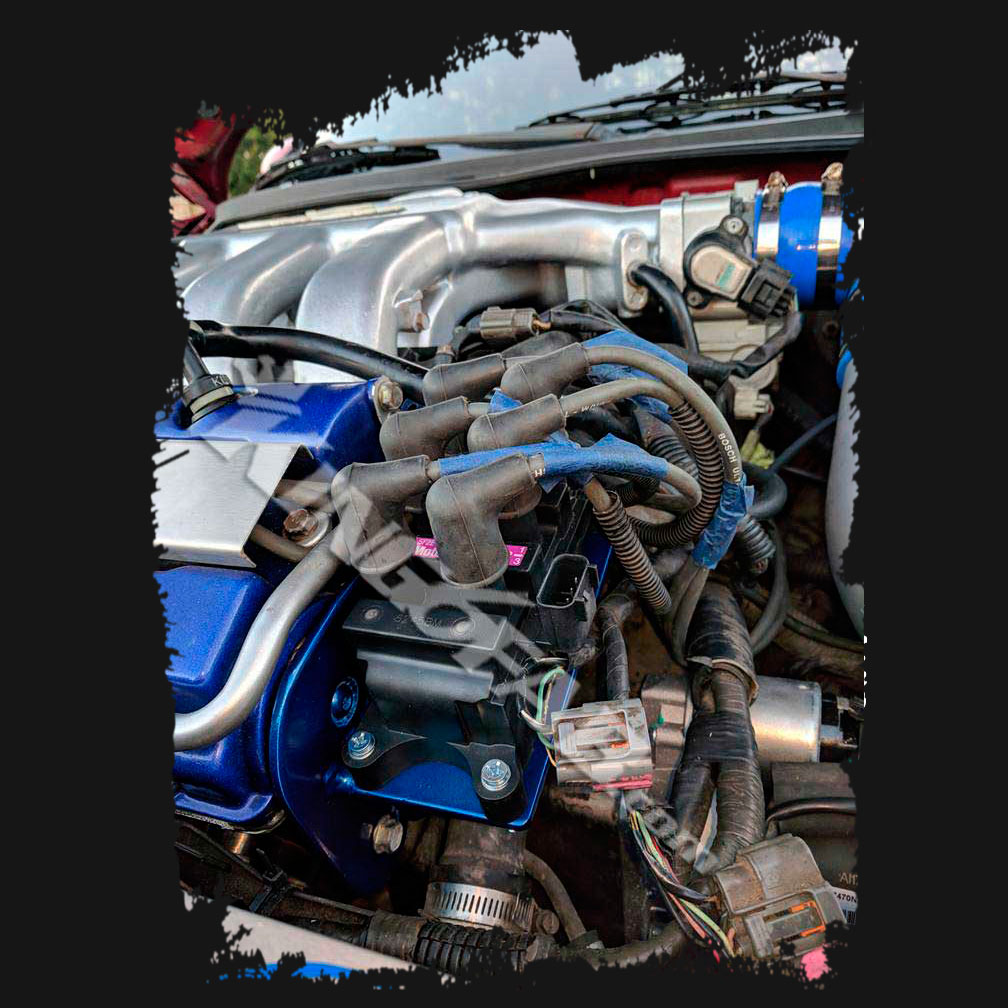
Coil Pack Mount
$45.00
- Description
- Additional information
- Average Fabrication Time
- Included In This Item
- Addtional Parts Needed
Description
Aftermarket Ignition Solutions
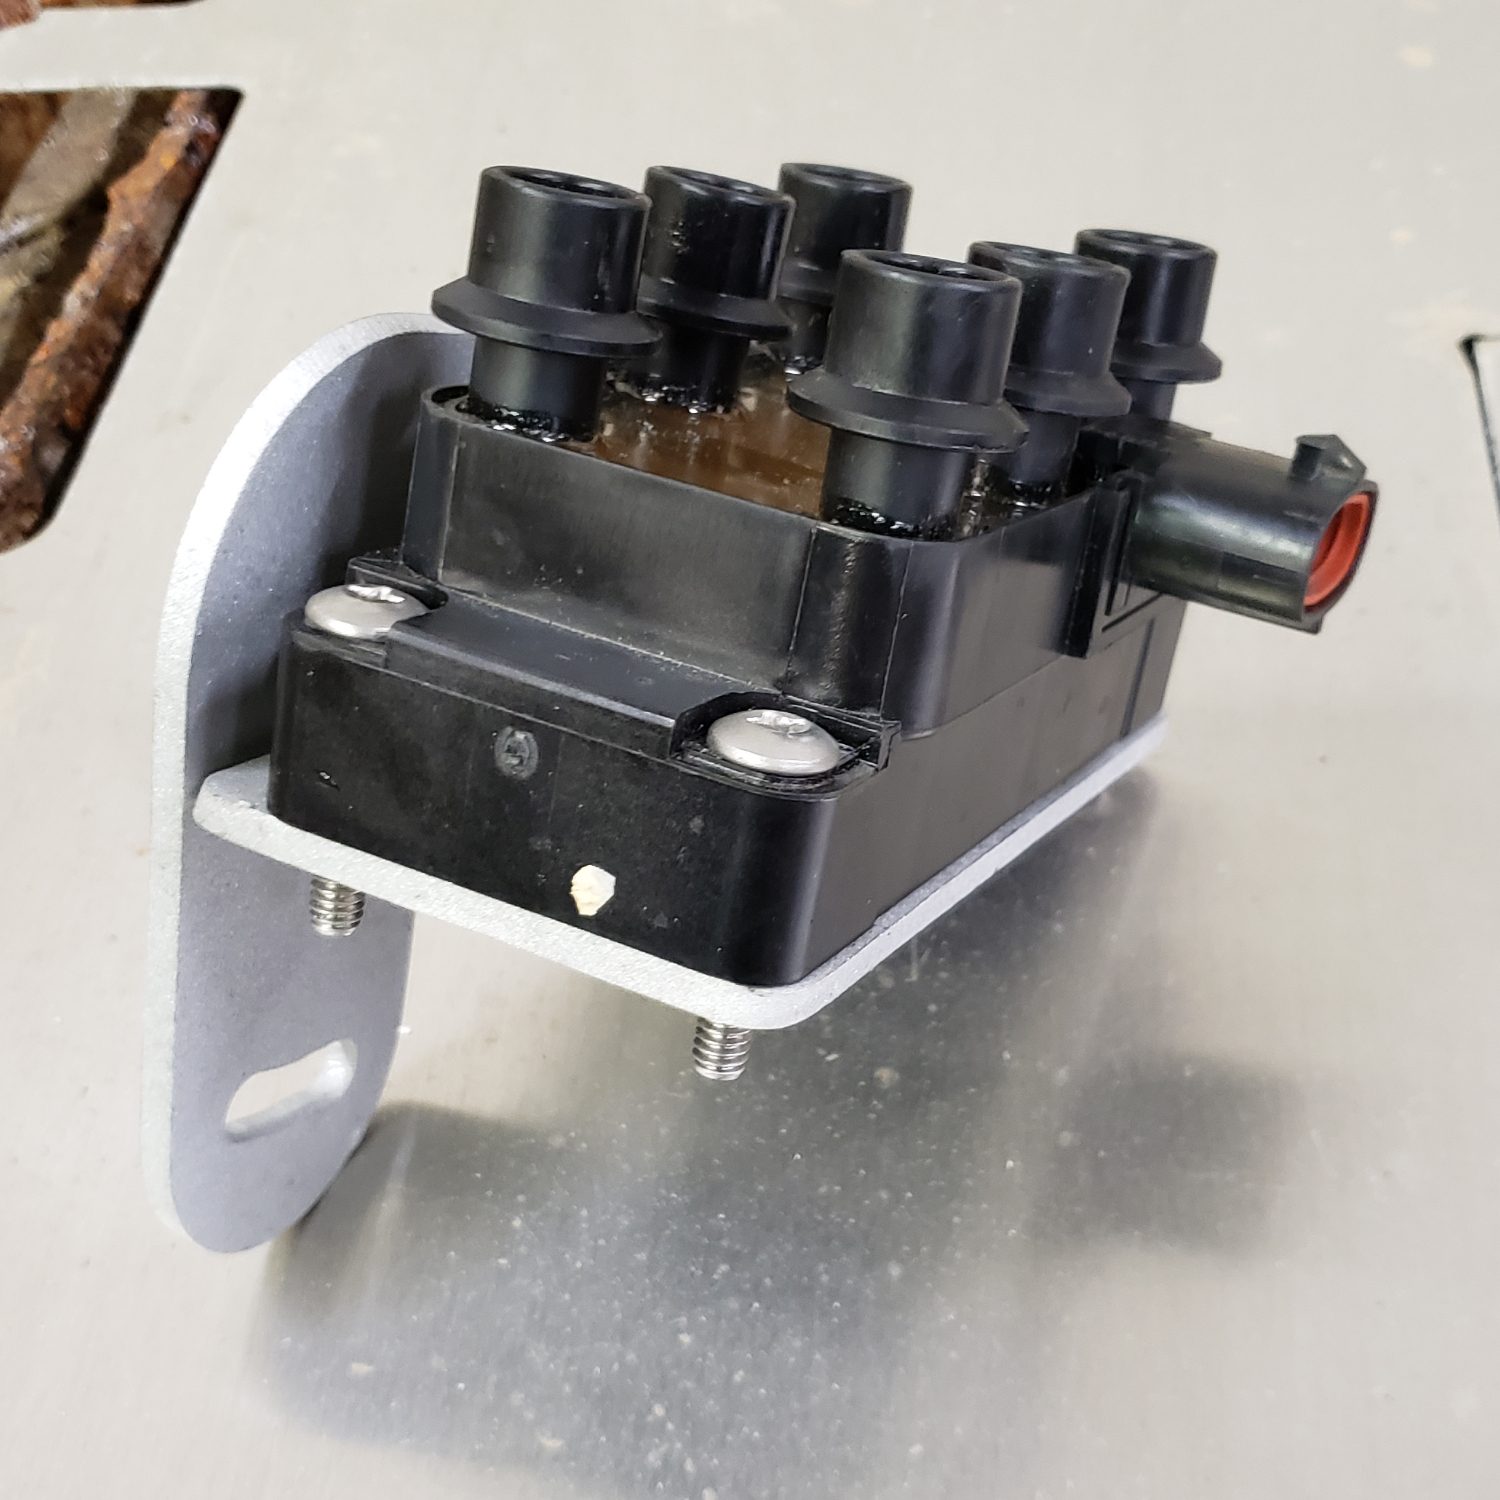
King6fab has developed a bracket for the KL V6 engine that can utilize the factory distributor location for mounting an aftermarket coil pack.
The bracket itself is complete constructed of 3/16″ 6061 Aluminum with a TIG welded Coil Pack Face plate.
- IGN-6 – is for the IGN-6 Coil pack from Diyautotune.com
- Freestar -is for the Ford Free Star Style Coil Pack
- 626 – is for the Mazda 626 Coil Pack
- Other – Is made with a large surface to mount virtually any type of coil pack with some modifications.
IMPORTANT INFORMATION
These coil pack brackets will require a plug to be put in the hole the distributor mounts into.
This plug comes from the 2002 Mazda 626, It is called the Camshaft Angle Sensor an can be purchased separately online.
Part # KLG4-12-603
Amazon Link: Mazda KLG4 Camshaft Plug
Coil Pack Bracket Design
Options
IGN-6 & Universal Bracket
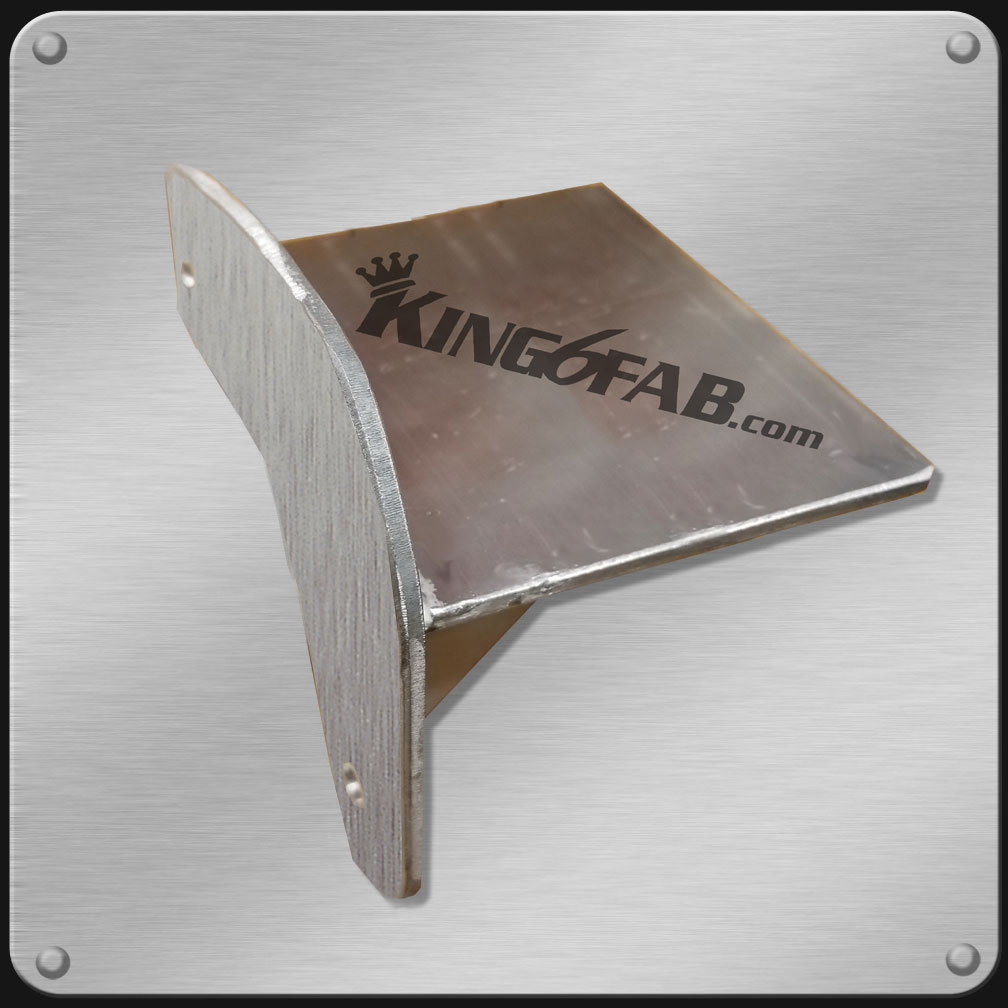
2001+ 626 Bracket
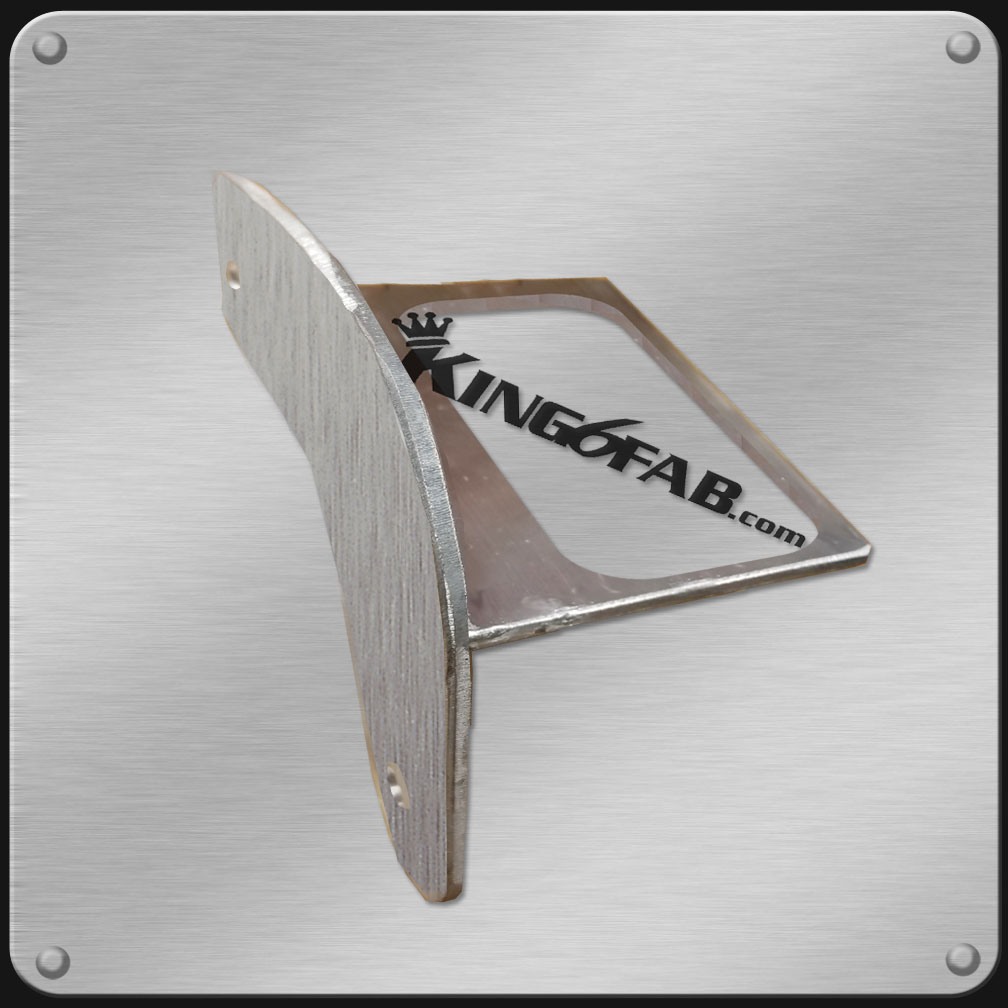
Freestar Bracket
Additional information
| Weight | 4 lbs |
|---|---|
| Dimensions | 6 × 4 × 6 in |
| Coil Pack Type | IGN-6, FreeStar, 626, Other |
Average Fabrication Time
All King6fab parts are made to the order. Below are the average estimated times it takes to fabricate this product before it is ready to ship. This does not include shipping times. Fabrication Time Terms & Conditions
| When no prior orders are being worked on: | 2-3 Days |
| Normal turn around: | 3-6 Days |
| When order is placed on weekends/holidays: | 3-8 Days |
| Large orders with multiple products | 6-12 Days |
Included In This Item
(Qty 1) Coil Pack Bracket
Addtional Parts Needed
IMPORTANT INFORMATION
These coil pack brackets will require a plug to be put in the hole the distributor mounts into.
This plug comes from the 2002 Mazda 626, It is called the Camshaft Angle Sensor an can be purchased separately online.
Part # KLG4-12-603
Amazon Link: Mazda KLG4 Camshaft Plug
Crank Pulley Upgrade
Crank pulley Options-
The MSPNP is preset up to run using the distributor, and it can be setup to run a coil pack while using the stock crank pulley, However this requires you to leave the distributor on the motor and plugged in for the CAM sensor inside of it. This can be unsightly and extra dead weight on the engine. If you want to remove it, follow below.
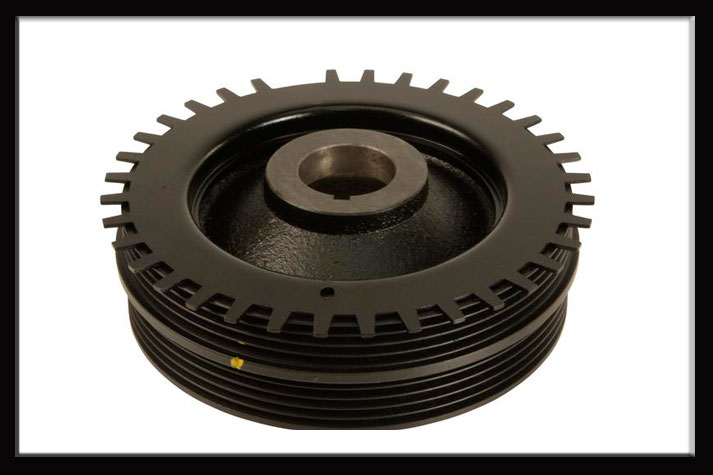
The Alternate option is a 36-1 wheel, witch will aid in start up time and fine tuning timing.
You will Need a Crank Pulley from a Year 2000 or newer 626, they are a direct bolt on pulley. These pulleys will have a 36-1 trigger wheel on it, They can be found anywhere from junkyards to ebay for less then $50.00. I recommend sticking to OEM, dont get a under-drive pulley..Under-drives have a tendency to come apart. whatever your gaining with it is insignificant compared to the power your going to make with boost
Ignition Control Wiring
Ignition Wiring
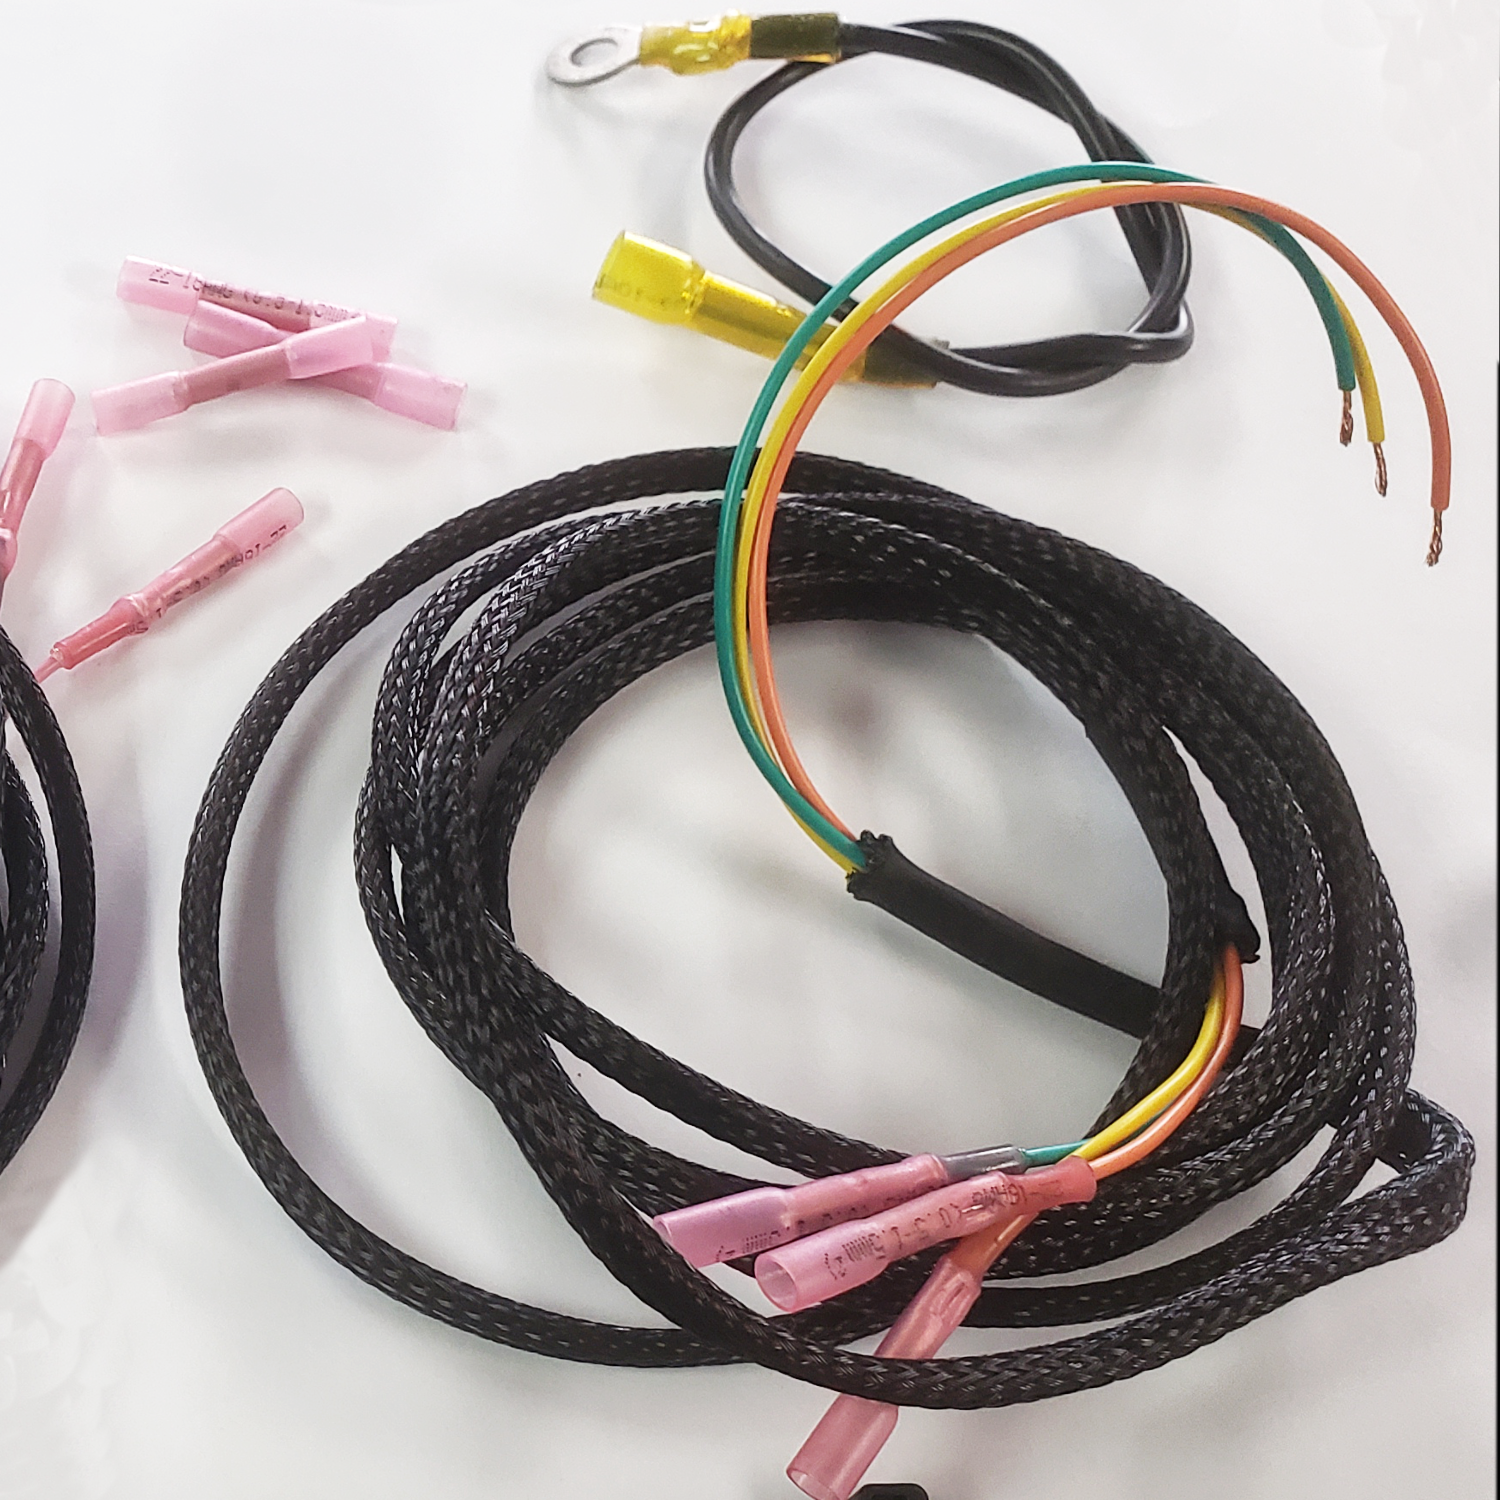
You will need to wire all these new ignition components together, You can either wire it up on your own using our diagram, or you can buy a Quality made harness’s From King6fab that adapts to parts included with your MSPNP2 and includes the same wire colors as the QuadSpark for easy identification.
MSPNP2 Harness w/Coil Pack Wiring
$65.00 – $130.00
- Description
- Additional information
- Average Fabrication Time
- Installation
- Included In This Item
- Reviews (0)
Description
K6F Wiring Harness for Plug & Play Megasquirt 2 (MSPNP2) for Coil Packs
King6fab’s color coded wiring harness’s, eliminates the headache, confusion and risk for problematic wiring.
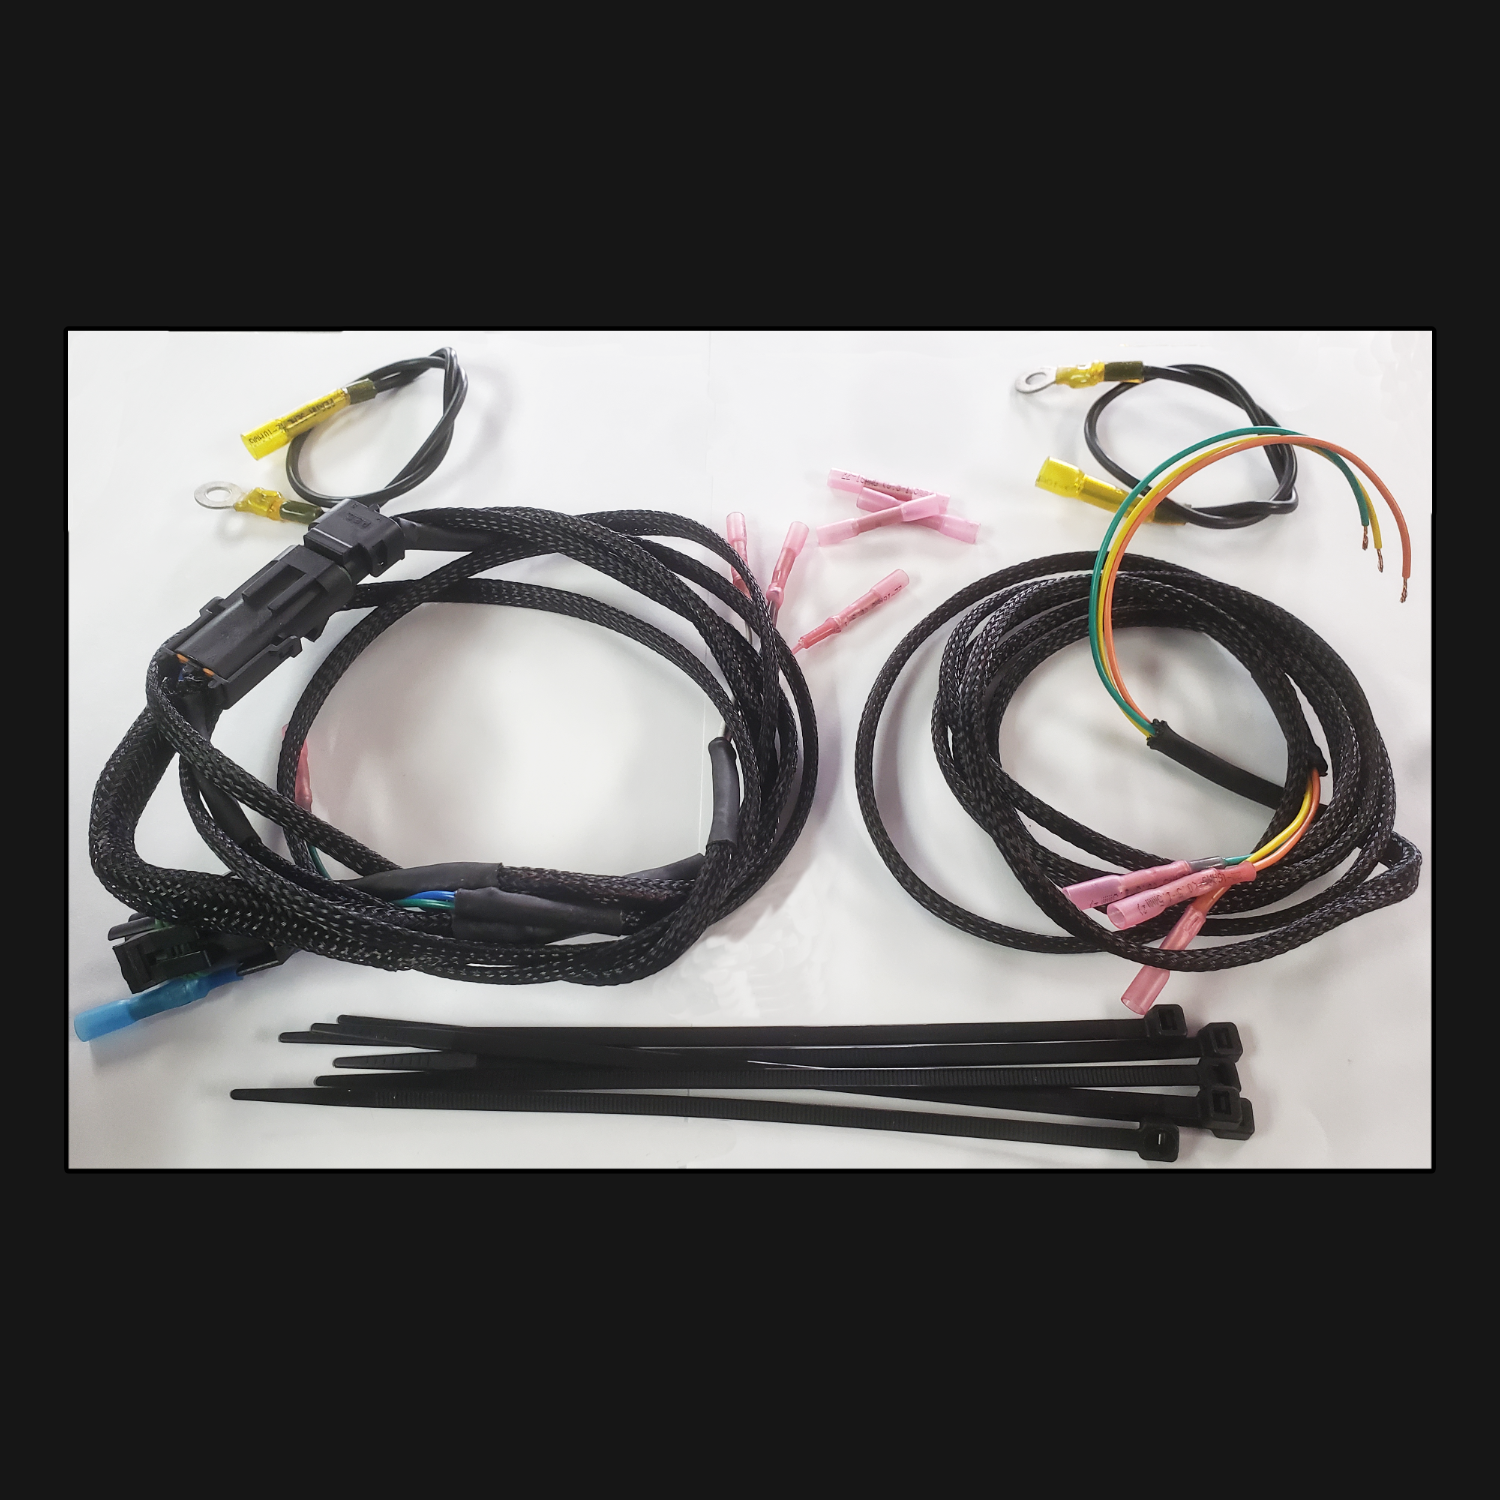
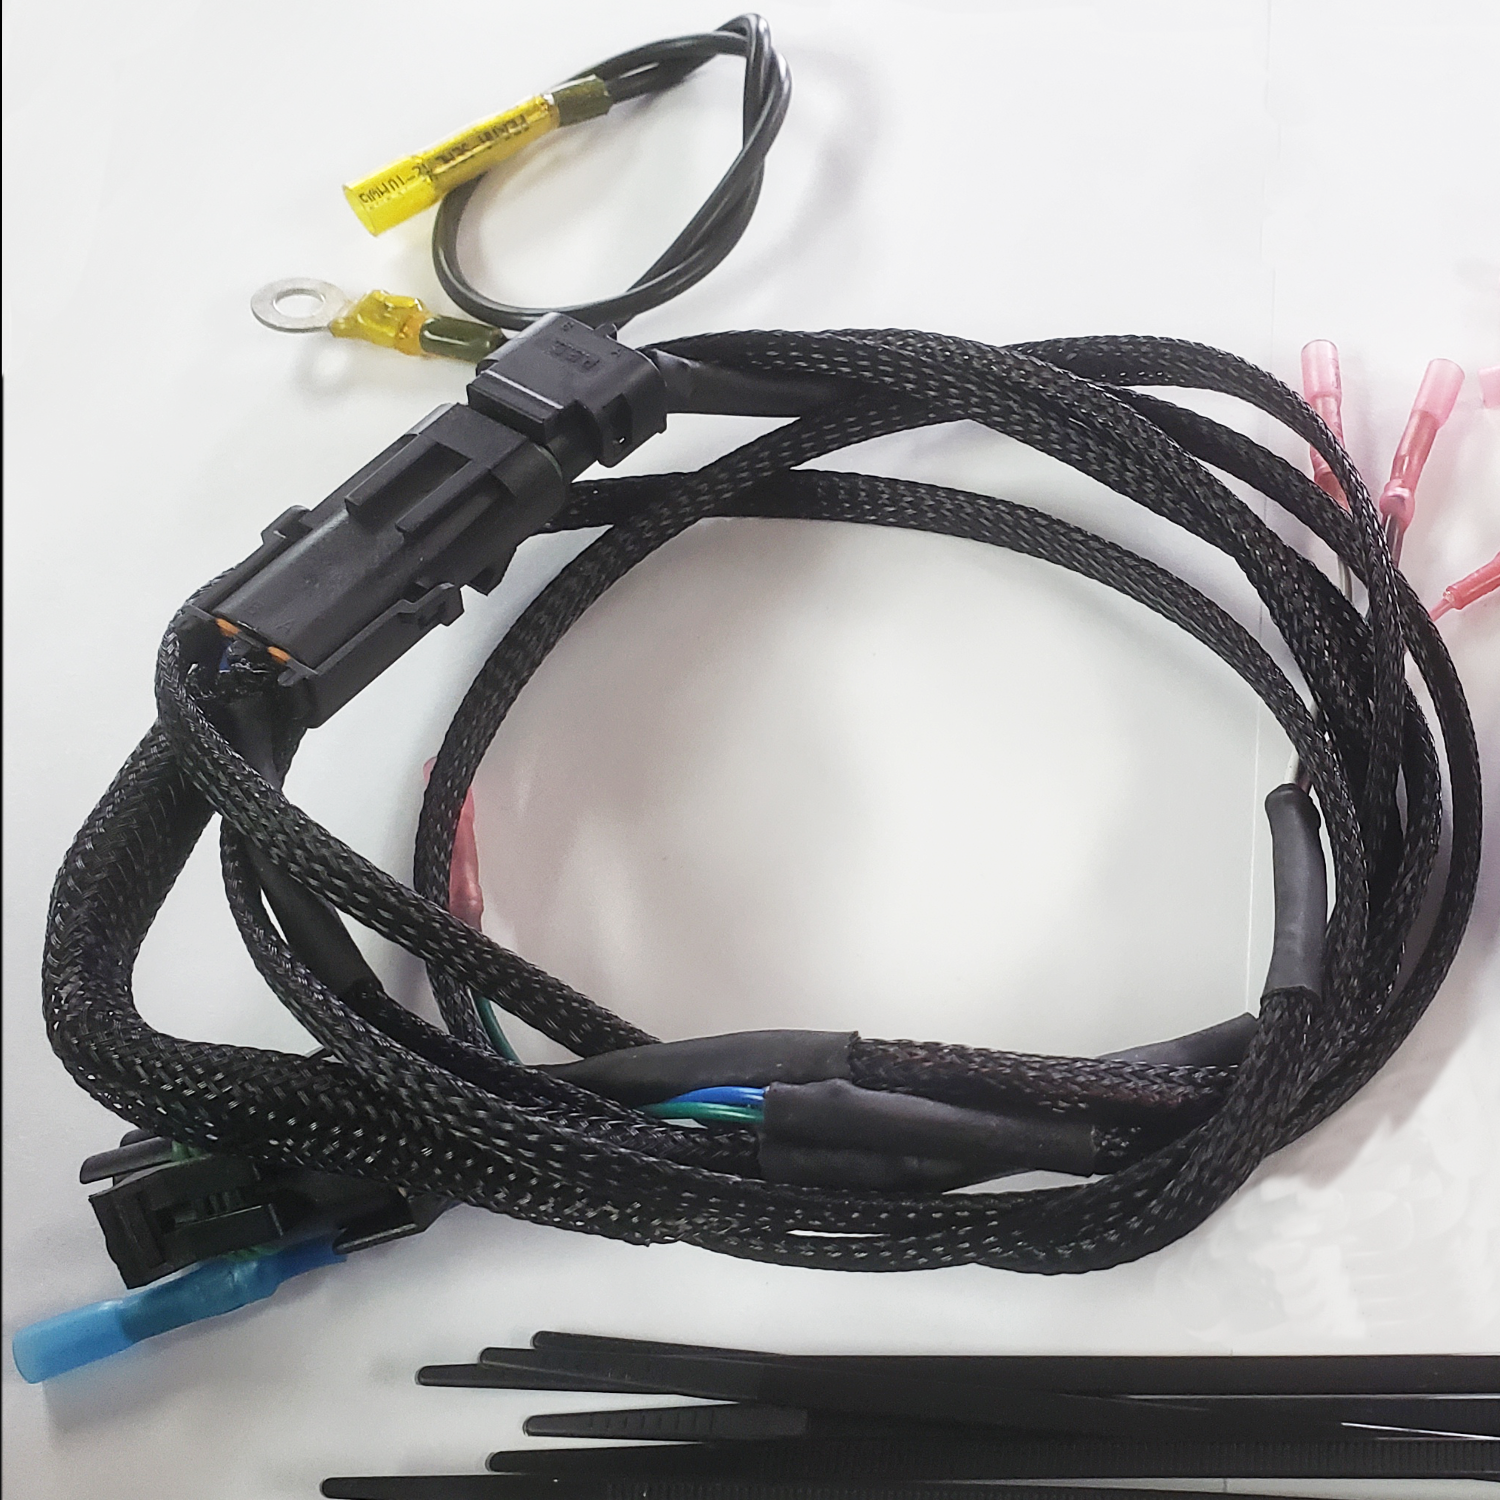
These harness’s will stretch from the PNPMS2 located in the cabin, through the firewall, to the coil drivers, from the coil drivers to the coil pack and from the coil pack to the tach signal wire. The wire harness’s are entirely made from color coded 18GA automotive wire, wrapped in expandable sleaving, with heat shrinkc crimped terminals and Delphi weather pack connectors.
Required for this wiring harness: (not included)
- MSPNP2 V1.2 & V1.3 Example: MSPNP Gen2 MK9395 from Diyautotune.com
- 6 Cylinder Coil Pack Example: IGN-6 from Diyautotune.com
- Ignition Module Example: Quadspark from Diyautotune.com
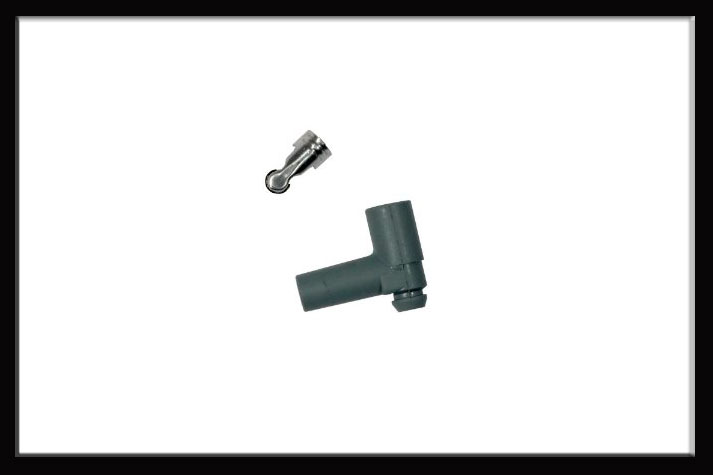
- Or* Coil on Plug / Coil Next to Plug Example: Honda CBR COP / AEM Smart Coil
Coil Pack Your Using
Options
- IGN-6 – This wiring will be complete with a IGN-6 connector and with Pre-Crimped connectors to personally wire any Coil Driver of your choice. Part#: IGN-6
- 626 -This wiring will be complete with a Mazda 626 (also Ford Taurus & Explorer ) connector and with Pre-Crimped connectors to personally wire any Coil Driver of your choice. Common Part #s: C925, FD480T, DGE446
- FREESTAR– This wiring will be complete with a Ford FreeStar/F150 connector and with Pre-Crimped connectors to personally wire any Coil Driver of your choice. Common Part #s: C1312, DG485, FD498
- OTHER -This wiring will be the basics with Pre-Crimped connectors to personally wire any Coil Pack or Coil Driver of your choice.
Tachometer Adapter
Option
- Yes- Your PNPMS harness will come pre wired with a Tachometer Adapter to allow your stock dash tachometer to function as it normally did with a distributor.
- No- Your PNPMS harness will need to utilize a Tunerstudio or MSPNP based tachometer signal from either one of its option ports on the DB connector. Commonly uses are: RaspberryPI or Tablets utilizing HUD, Digital cluster retrofits, custom installs And/Or External 5″ Tachometers such as 5″ Autometer Monster Tach
Additional information
| Weight | 3 lbs |
|---|---|
| Dimensions | 6 × 8 × 1 in |
| Coil Pack Your Using | IGN-6, 626, Freestar, AEM Smart Coil, Honda CBR, Other |
| Tachometer Adapter | YES, NO |
Average Fabrication Time
All King6fab parts are made to the order. Below are the average estimated times it takes to fabricate this product before it is ready to ship. This does not include shipping times. Fabrication Time Terms & Conditions
| When no prior orders are being worked on: | 2-3 Days |
| Normal turn around: | 3-6 Days |
| When order is placed on weekends/holidays: | 3-8 Days |
| Large orders with multiple products | 6-12 Days |
Installation
Click here to go Installation Instructions
Included In This Item
- (Qty 1) Harness A. Connects to the DB15 or DB26 connector at the PNPMS2 to and is routed to the Input on the Coil Driver (5ft total length)
- (Qty 1) Harness B. Connects to the Output of the Coil Driver and is routed to the to the Coil Pack with an weather connector to a tach adapter.(5ft total length)
- (Qty 1)Harness C. Connects to the opposite end of the weather connector from Harness B, has a built in tachometer adapter and power supply wire for the coil pack to hook to your factory tach wiring via shrink butt connectors.
- (Qty 2) 10GA Ground attachments for the quad spark
- (Qty 5) 8inch Ziptie
Only logged in customers who have purchased this product may leave a review.
Tachometer Adapter
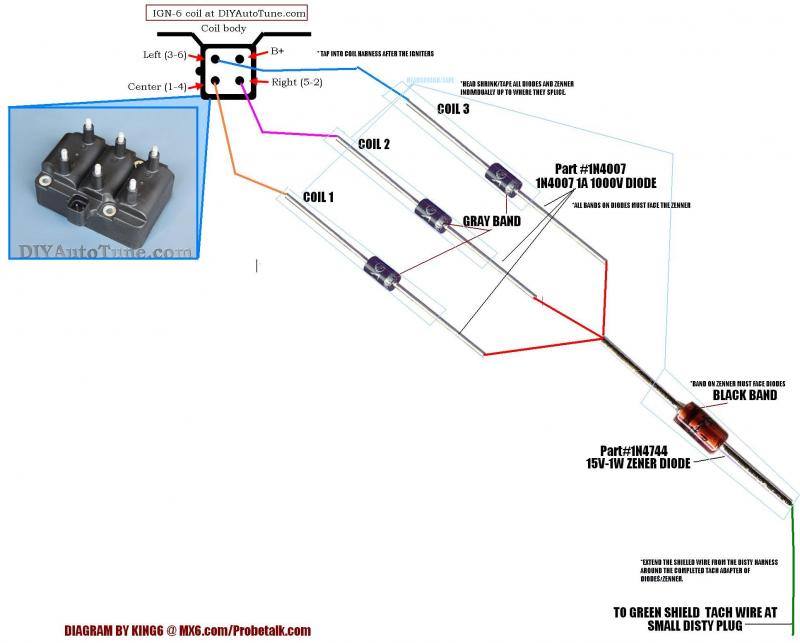
If you choose to make your own harness, you will also need to make a tachometer adapter so that your factor dash tach will read correctly. This is done with (3) 1N4007 Diodes and (1) 15v-1w Zenner Diode tied into your igniter outputs and ran to the tach signal wire on the distributor wiring. ( see diagram )
Installation for those using the OPTIONS
1.Follow the instructions from DIYautotune to install the PNPMS and the IAT Sensor
2.Replace the crank pulley with the 36-1 pulley
3.Mount the quad spark and the Coil pack in desired locations.
4.Wire in or plug in the pre-made harness’s.
5.Install wide-band, and run the output connection the specified pin on the DB15 connector at the PNPMS. The output out of the AEM uego wide-band is the white wire.
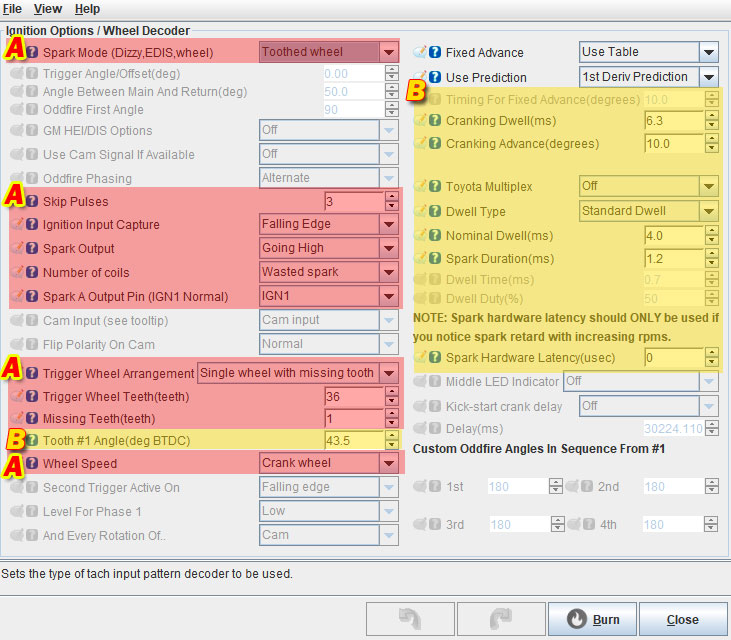
Step 4a. Open up tunerstudio with the key in on position, and change the following settings in your ignition control.:
Open up Tunerstudio with the key in on position, and change the following settings in your ignition control.:
Installation Complete
From here, you have the opportunity to play with your VE Fuel tables, and Ignition tables, along with adjusting the Target AFR tables – this is discussed later in this guide.








Reviews
There are no reviews yet.