Step 1. These are the components you will need to purchase for your digital dash build
Required Componets
These are the essential components needed to build the digital dash
I am text block. Click edit button to change this text. Lorem ipsum dolor sit amet, consectetur adipiscing elit. Ut elit tellus, luctus nec ullamcorper mattis, pulvinar dapibus leo.
Required Componets
| Part | Description | Link | Picture | More Information |
| Pi4B | Raspberry Pi4B (4GB) | Amazon Link |  |
Setup Pi with TSDASH |
| SD Card | You need an SD Card up to 8GB or More | Amazon Link |  |
|
| Heatsink & Fan | Geeekpi Heatsink and Fan for Pi4 | Amazon Link |  |
|
| LCD Screen | VS DISPLAY 12.3″ 12.3 Inch 1920X720 LCD Screen HSD123KPW2-D10 | Amazon Link | 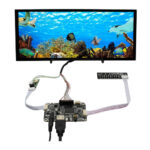 |
Get the Right Screen |
| HDMI Cord | HDMI to Micro HDMI Cable 3ft | Amazon Link |  |
|
| Voltage Regulator | Constrains voltage to 12vt constant. | Amazon Link | 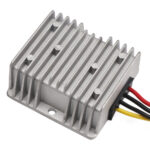 |
|
| Barrel Jack Connector | The screen requires a 2.1mm Male Barrel Jack Plug | Amazon Link | 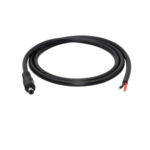 |
|
| Time Delay Relay | 12vt Time Delay Relay Controller | Amazon Link |  |
Setup the Timer |
| Relay Module |
12V 4 Channel Relay Module Board Shield with Optocoupler Isolation |
Amazon Link | 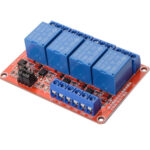 |
Using the Module |
Step 2. You must decided on the type of Voltage Converter you will use on your digital dash build
Required Voltage Converter
The voltage converter is used to power the Raspberry PI and other Accessories
Voltage Converter
A Voltage converter that can take 12volt and output 5volts is required to power up the Raspberry Pi and digital fuel gauge (if using). There is 2 options available that have pros and cons.
Option 1.
Pros:
- Uses USB outputs that allow you to connect the Raspberry pi using a USB to USB-C cable.
- Small in size and clean connections
Cons:
- Will require you to cut a USB cable to wire to fuel gauge power wire. Additionally, you can buy a precut cable from Amazon.
- Low amps, cannot expand for accessories.

USB cable with cut end
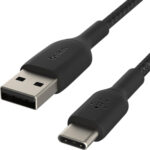
USB to USB-C Cable
Option 2.
Pros:
- Can be wired direct to the digital fuel gauge power wire.
- Enough to amps for additional Accessory’s such as another Raspberry Pi
Cons:
- Will require you to cut a USB-Cable to connect to the USB-C port on the Raspberry Pi, or solder wiring to the Raspberry Pi power port on PCB.
- Its Large and requires more space.
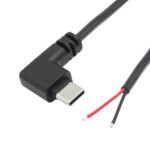
USB-C Cable with Cut End
Voltage Converter Options
| Part | Description | Link | Picture |
| Option 1: Voltage Converter | 12vt to 5vt 1.5amp Converter | Amazon Link |  |
| Option 2: Voltage Converter | 12vt to 5vt 3amp Converter | Amazon Link |  |
Step 3. You must decided on the type of Indicators you will use on your digital dash build
Required 8mm Indicators
The cluster is designed to utilize 5/16 (8mm)12vt LED Indicators
2 Types of indicators exist, either can be used and have differences in appearance.
Option 1
Pros:
- Less Expensive, normally $10-$13 for a pair of indicators
- Customizable, you select the icons and colors you want.
Cons:
- Will show the icon in white when not lit up
- Larger fastening head requires recess in the 3D Print
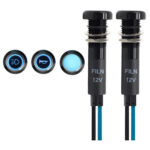
Option 2:
Pros:
- Low profile and black shell make them stealth looking.
- Tinted so indicator is not visible when not lit up.
Cons:
- Expensive, often $10 to $12 per indicator
- Must purchase the indicator desired individually.
- Color and Icon not customizable
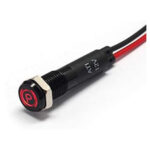
| Part | Description | Link | Picture |
| Option 1: Customizable Indicators | Color and Icon Customizable | Amazon Link |  |
| Option 2: Stealth Indicators | Non Customizable | Amazon Link |  |