OpenAuto-Pro
Android / Raspberry Pi Touch Screen Radio
The Idea
I’ve had the Pioneer deck in the car for 2 decades, I bought it in 2002 and it has been a great radio, however it can only play CD’s. To stream from a phone, id either need to connect an Aux cord directly to it or a aux Bluetooth receiver. Both these options are acceptable for the amount I drive the car, and to be honest in the past 9 years i dont even think i turned the radio on when driving. But, when I get an idea for something, I have to try it.
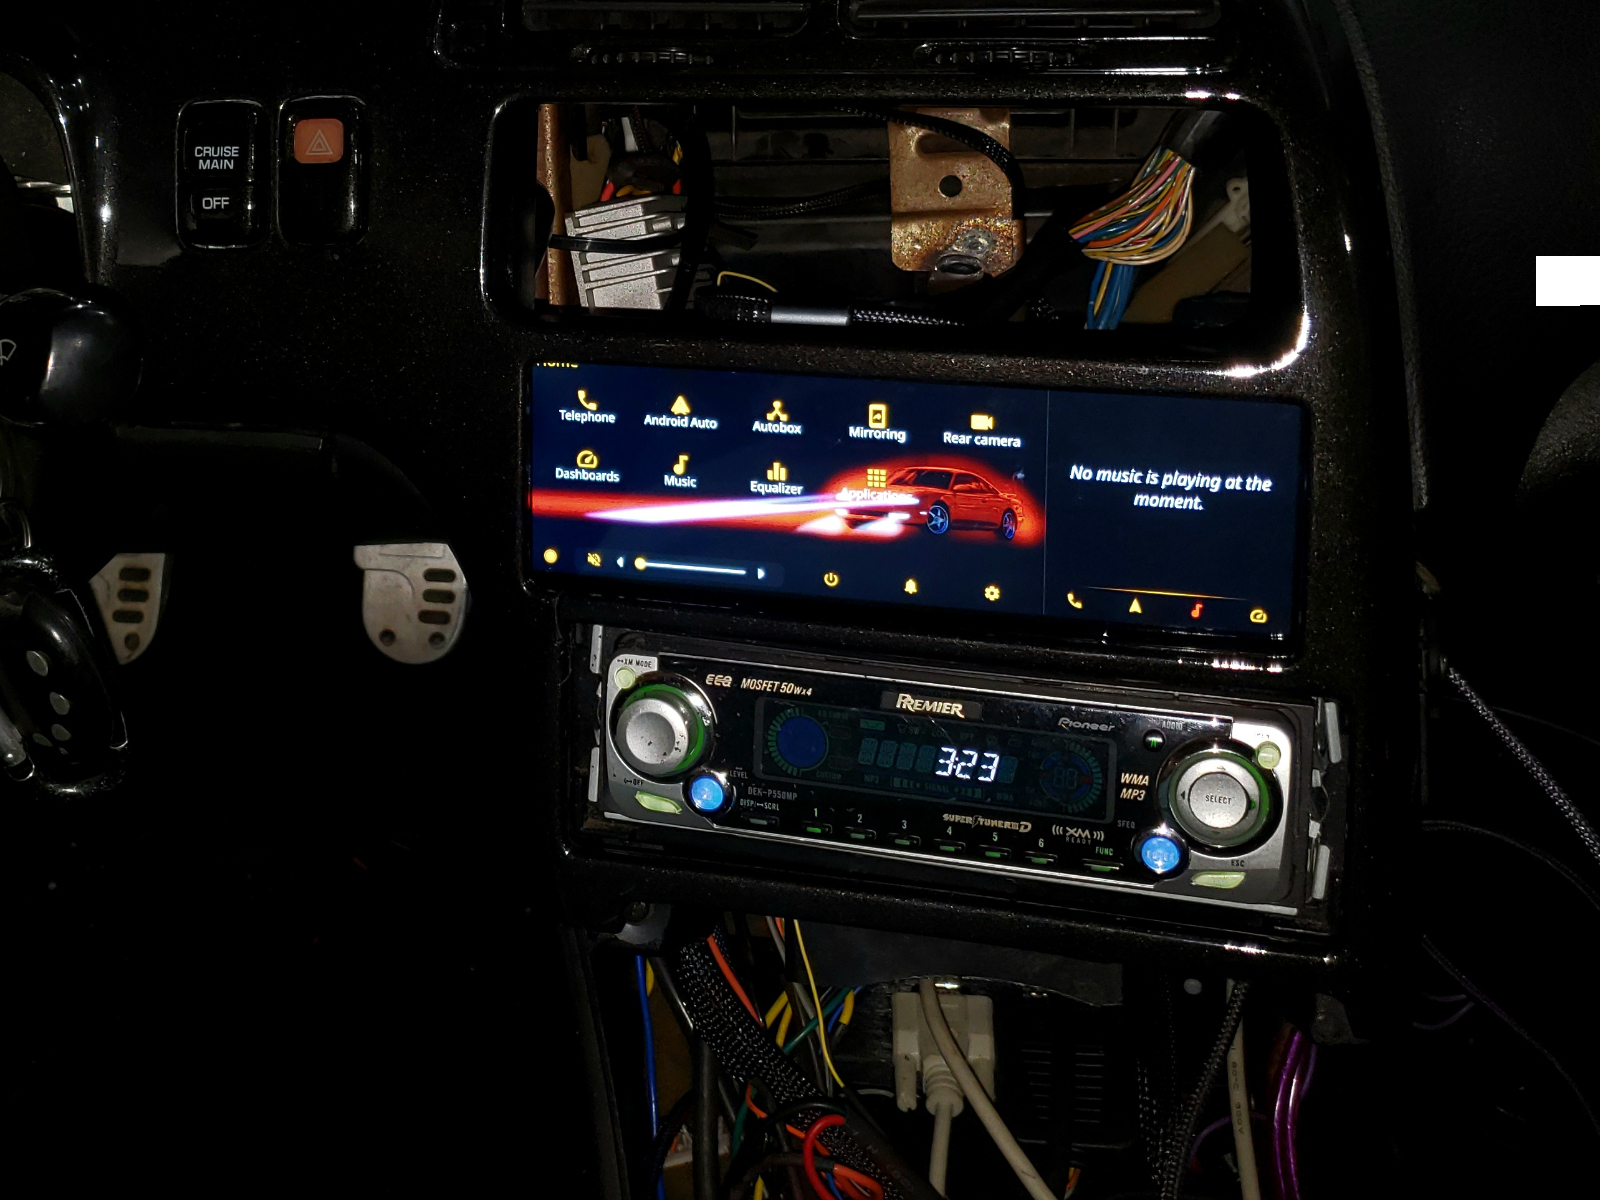
I wanted something that looked like it was designed to be part of the car, like it could have been a factory option. I did try a detachable interface that would be mounted externally to the dash pieces, but it looked to cluttered and it didn’t have customizable features in its interface.
I found OpenAutoPro software for the Raspberry Pi and also found a touch screen with dimensions that would fit very tightly in the din slot of the Mx6. I have “some” experience with the raspberry pi so i decided why not give it a shot.
This software has a lot of features and can be expanded on with coding knowledge. It also offers a lot of customization. From colors, wallpapers, boot screens, to font size.
If your interested in this software its : Bluewave Studio OpenAutoPro
I started this project trying to make it for as low cost as possible. Originally only planning to make this radio a piggyback to the Pioneer deck. It would only feed sound output to the Pioneer that would control the volume and mixer controls to the speakers. I didn’t think that id need additional options like a backup camera or usb storage so i declined to get those componets.
To mount the new radio, it required some trimming of the plastic dash framing. It also required sanding on the inner side of the dash trim so that it didn’t push down onto the screen when it was snapped into place.
After many test fits and testing of the radio, I was rather impressed and began coming up with ideas to remove the pioneer radio to place all the Digital dash components in its place. I also figured why not get a backup camera and usb storage.
At this point, Ive already got a decent amount of money wrapped into this project, so I decided to make this an entire standalone setup. That required a 4 channel amplifier and digital audio processor. This was more then I wanted to spend, however it seemed reasonable that If I was going make a cool radio, it should be running a decent sound system.
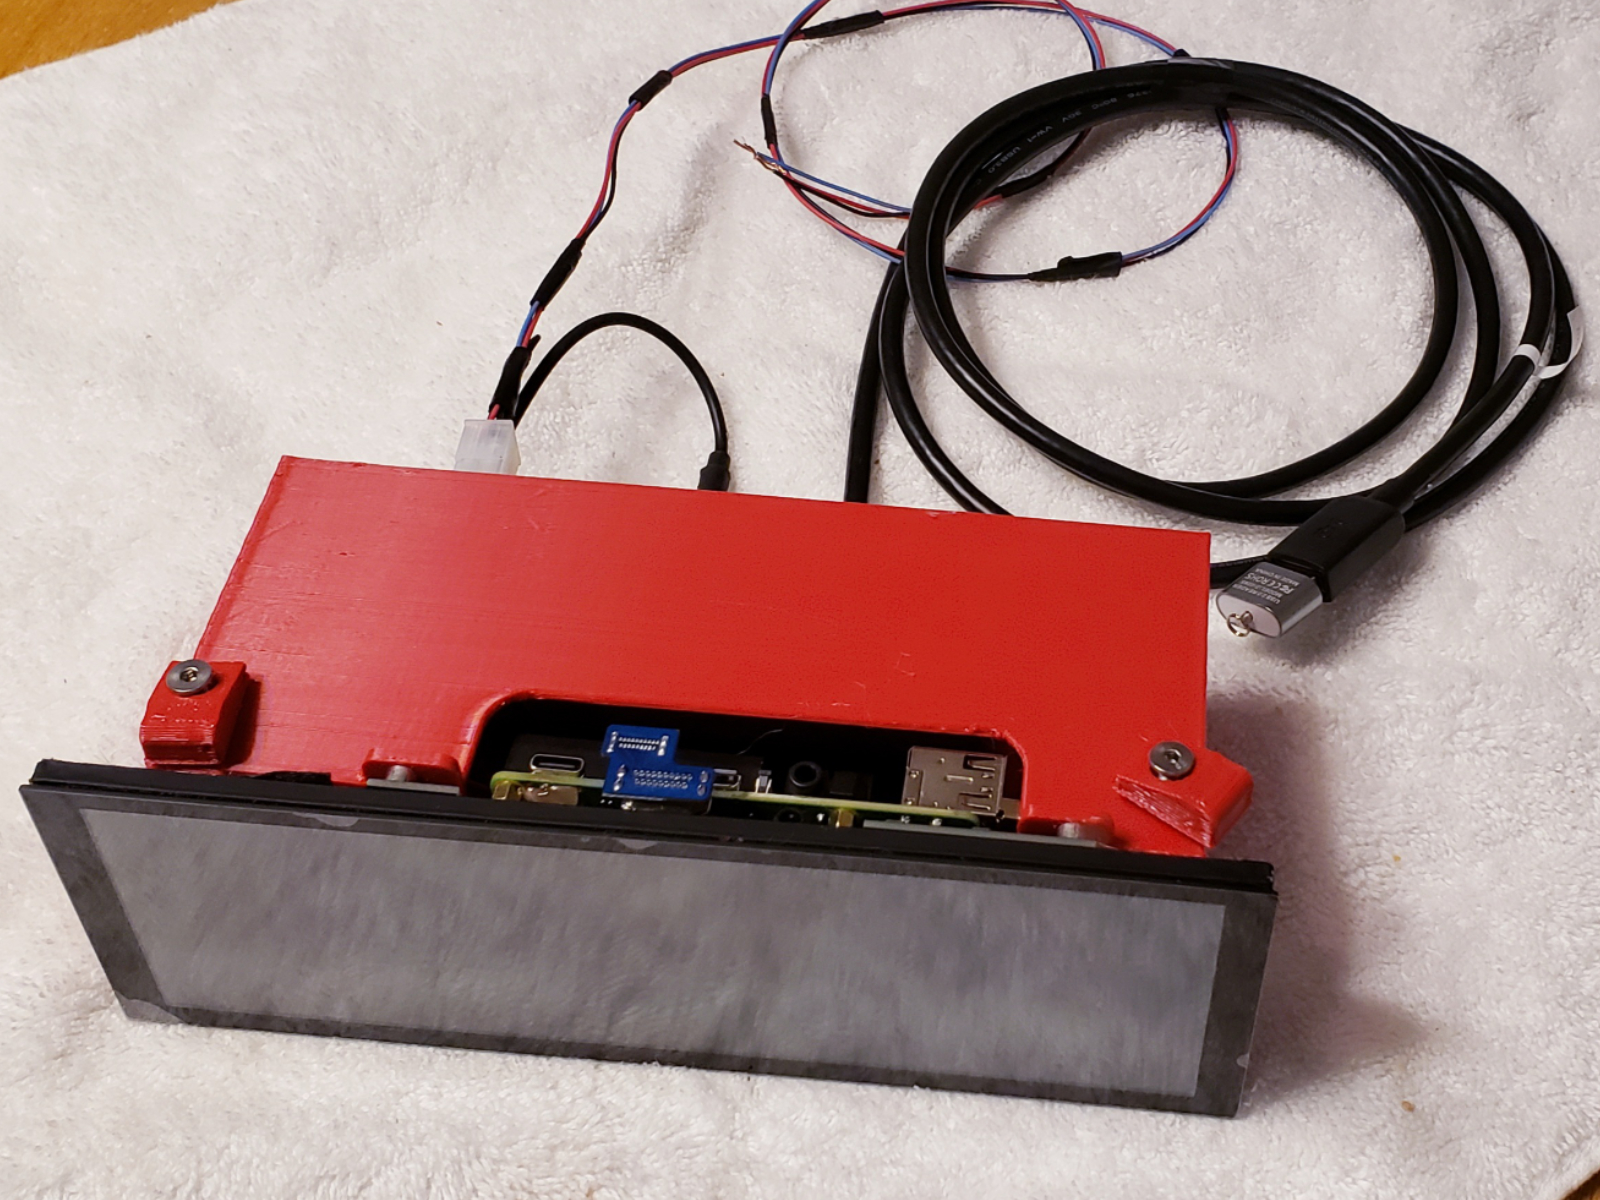
I designed all the 3d printed components in Fusion 360. With the touch screen in hand I was able to use its dimensions to create a mock up of the entire build. I found a Pi4 model on GrabCad and was accurately able to plan this whole project out.
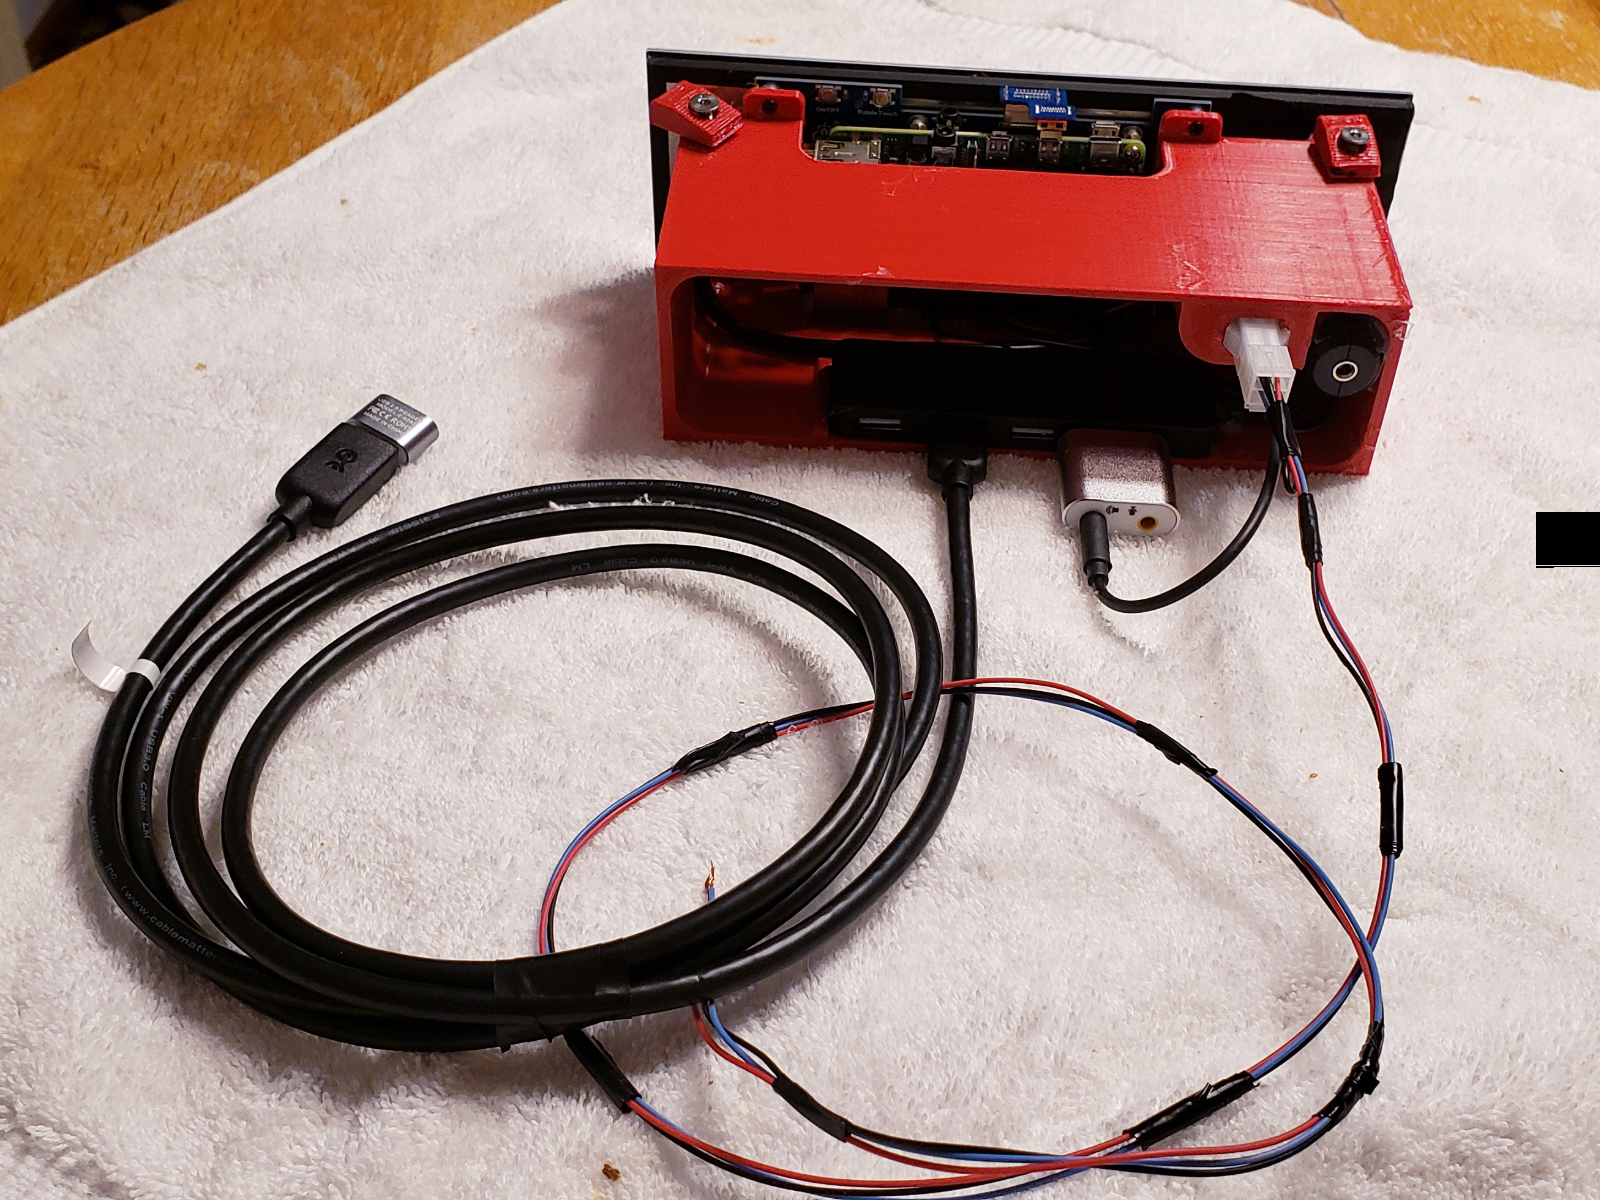
I printed the body of the radio that would hold the screen in ASA filament at 10% infill. The body and Pi4 are attached to existing screws on the screen structure.
If you would like to print this body for a project of your own, the stl can be found on Thingiverse: King6fab Designs
The Build
The build consists of the following components.:
- Raspberry Pi4 4GB
- 8GB Micro SD Card
- Waveshare 7.9 Touch Screen
- Voltage Step Down Converter
- 3.5mm Audio Cable Ground Loop Isolator
- USB Audio Sound Card
- USB Video Card
- 6ft USB Extension Cable
- 4 Port USB Hub

There is a bit of a learning curve with this software.. To Customize it. Otherwise in default settings, it works straight outa the gate.
Issues I encountered:
- The screen wasn’t showing the entire UI, This involved finding a file in the Raspberry Pi and changing a setting.
- Next came power failures, after connecting a reverse camera and turning it on, Id get low voltage warning and frequently the pi would shutdown and reboot.
- I then had the issue of the SDCard getting corrupted when disconnecting power.
1. This fix was easy but complicated if your not familiar with Pi operating system. The process was to go to close OAP (Openauto-pro), and instead of choosing shutdown, push back. This then minimizes OAP and shows the Rasbperry pi desktop. From here i found the folders icon, and then browsed the folders to find: openauto_system.ini.
Location: /home/pi/.openauto/config/openauto_system.ini
Open that file, then Find the heading: ScreenType=0
Then change that 0 to a 1 and save. (1 = Widescreen)
2. This was a result of the video capture card taking to much power when the camera was on, and the solution was to swap from a 5v 3amp power inverter, to a 5vt 10 amp power inverter.
3. This was result of the SDCard having read/write capability. The card would get corrupted if something was being written while power was disconnected. The fix was to lock the SDCard to Read Only.


